

Image: Brittany Goldwyn
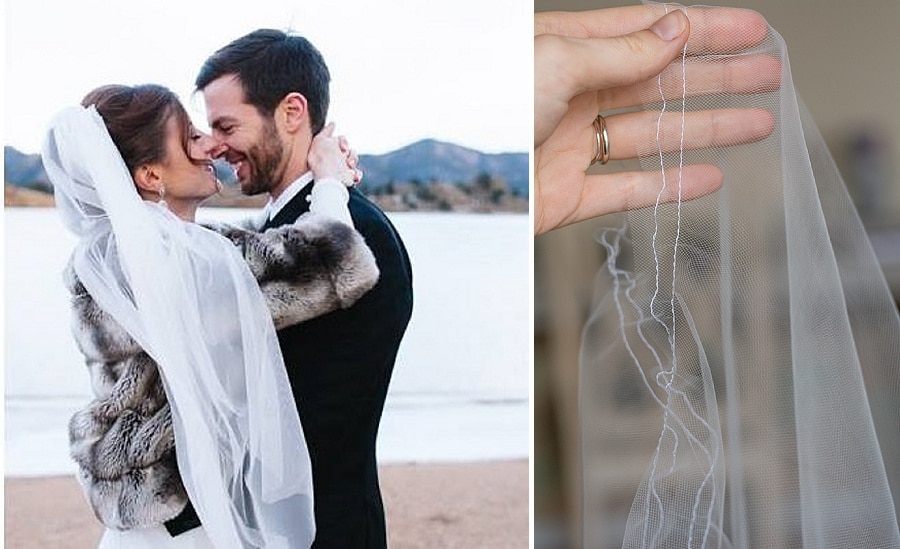
I was pretty adamant against wearing a veil for my own wedding. It just didn’t feel like “me” and I really didn’t like the history behind veils. However, I understand that not everyone feels that way and lots of brides LOVE veils and want to wear one for their wedding day. But veils can be EXPENSIVE. Which, I never really understood because it’s basically just a piece of tulle right!? ;-p So for you DIY Brides out there that are considering making your own veil, we have Brittany on the blog today sharing how she made hers!
How to Make a DIY Bridal Veil
Materials:
- Fabric (I’m using tulle, which is cheap and available by the yard at your local fabric store or easily on Amazon: Nylon Tulle in 30 Colors
)
- Iron and ironing board/pad
- Sewing machine
- Needle and white thread
- Scissors
- Measuring tape and something to mark your fabric
- Comb (plastic, wire, they both work–it will be hidden in your hair)
There’s a LOT of up front things to consider first – the type of veil you want, the length, and the material. Brittany covers ALL that (and more) over on her original blog post. But for us, we are just going to share the step-by-step instructions.
Step #1: Gently iron out any kinks or folds in your fabric. Then, lay the fabric on large, flat surface. I’ll be using a piece of fabric that’s 55in wide and 30in long, so the finished product will give you an idea of how the measurements I’m using look.
Step #2: Use your measuring tape, mark where you’ll need to cut. Since I’m leaving the edges of the veil raw (i.e., I am not adding a ribbon trim or something similar), I cut very carefully.
Note: If you want to round the two corners on the bottom of your veil, you are more than welcome to do so! You’ll just need something round to trace, which will ensure that each corner is evenly cut. You could also get crazy with sewing (or gluing, if you’re not up for sewing trim) ribbon or lace along the edges. There are a million different veil cuts and style, but I’m just a simple gal.
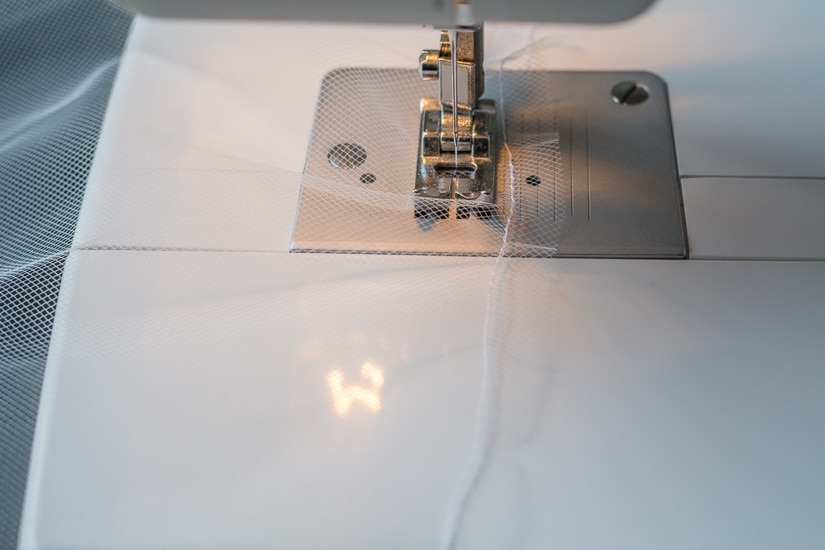
Step #3: It’s time to sew. Set your sewing machine on the longest stitch length and sew a straight line of stitches along the top (one of the width sides) of the veil. Make sure to leave a long tail from your bobbin thread.


Click inside for the rest of this DIY Veil Tutorial!
Step #4: The fabric may have bunched a bit while sewing the line in step #3. That’s okay. Flatten the fabric; then, sew a second straight line of stitches about one-half inch below the first line of stitches. Leave a long tail from your bobbin thread here as well.
You now have two parallel lines of stitches! Congratulations. That was the hardest part.

Step #5: Now it’s time to gather the fabric to morph it from a piece of flat tulle into a veil. To do so, hold the veil and gently pull the bobbin thread for each straight line of stitches. Your fabric will begin to gather.
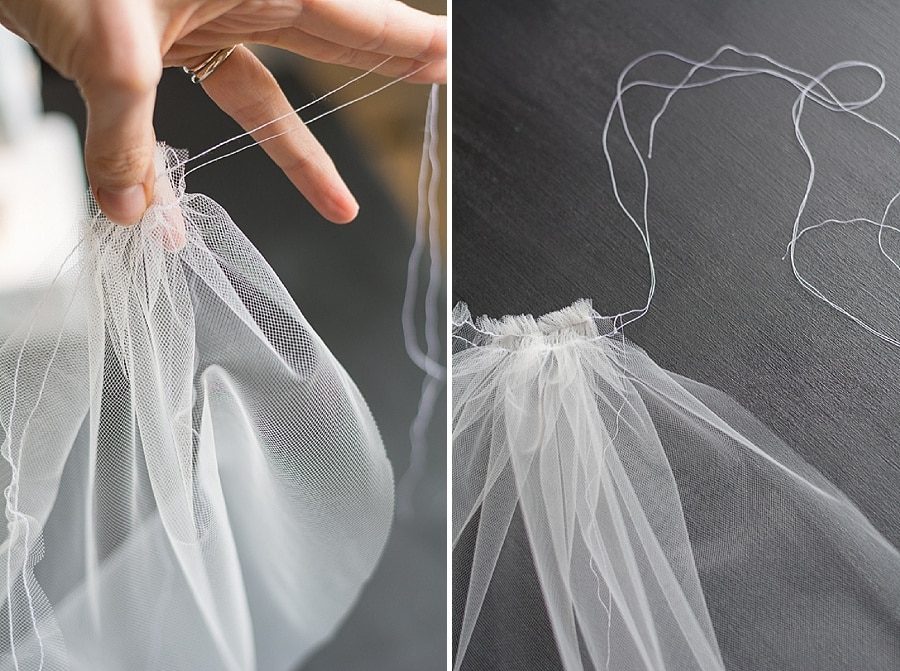
If you end up with a bottle neck of bunching fabric, you can help it along:

Step #6: When your fabric is gathered enough to be the same length as your comb, tie the threads at each end. Trim the excess thread, as well as the excess tulle from the top.


Step #7: The veil is done, but you need a way to attach it to your head. Grab your comb and set it so that it’s curving up. Then, lay the gathered edge of the veil on the comb. Ensure the side of the veil that you’d like to be on top is facing UP. Use your needle and thread to sew the veil onto the comb by sewing stitches around each comb tooth. When you’re done, tie knots in the threads on the end.

Your veil is done! Put it in your hair with the comb teeth facing down and with the comb curving toward your head.

For additional pictures, information, and help – please visit Brittany’s blog for the full tutorial! Thanks again to Brittany for letting us share.
[icon size=”small” image=”icon-heart”]


