Images & Tutorial: Jenn Heller Design Co
You guys! DIY WEDNESDAYS ARE BACK! Who is excited? I am excited and we’re kicking it off in STYLE. Jenn & her amazing skills are on display today, bringing you the awesome with her DIY Hanging Airplant Terrarium Planter. Step by step instructions with images, coming at you:
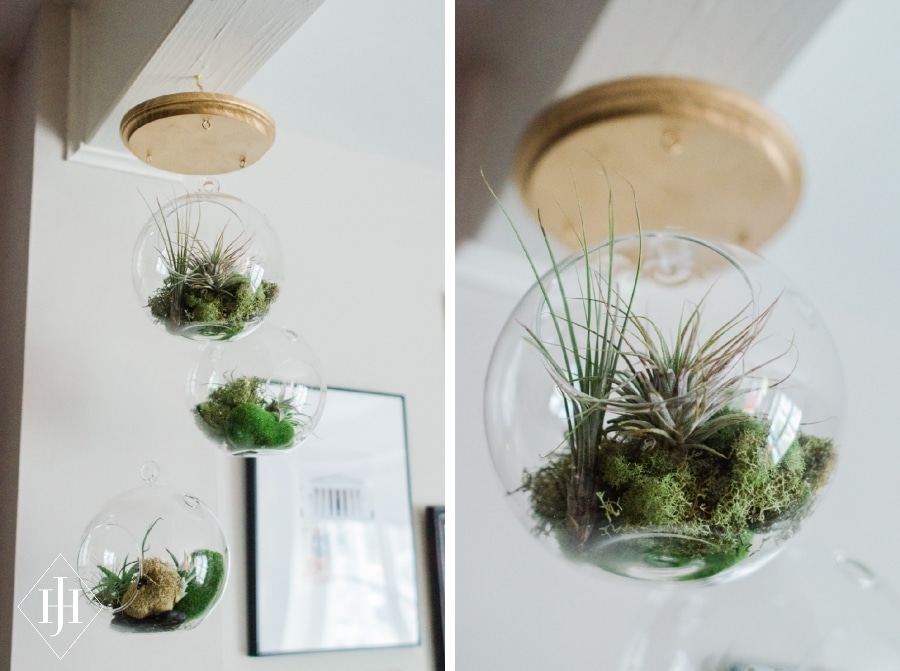
Hanging Terrarium Planter DIY Tutorial | By Jenn Heller Design Co
Are you seeing a theme here for my DIYs? I love plants, and I especially love keeping them away from my scavenging jerk cats. In a cruel twist of fate (or poor judgement, you decide!) our home has both low ceilings and very little natural light, so keeping elevated plants alive in the house is difficult. We also have this strange beam running across our living room, and for a long time I thought it could use some sprucing up.
Enter, the hanging terrarium in the corner of our living room. Full disclosure, I made this with real beautiful air plants the first time. And within three months of my total neglect, the shriveled and died, and now my terrariums contain lovely faux air plants.
Time: 30 minutes + paint drying time
Difficulty level: Easy peasy
Cost: This cost will vary a lot based on the hanging globes you use, how patiently you wait for deals, and what you put inside them. Many of these supplies can be found at your local craft store if you have one near you!
What you’ll need:
- Hanging glass globes – Amazon has a great deal on this set of three. They are a little smaller than the ones I used but you could use even more of them for an amazing effect!
- Wooden plaque for mounting
- Small brass screw eyes, one for each hanging globe plus any you might need to install the finished group. Mine came with this handy hanging kit.
- Invisible thread or fishing line
- Terrarium filler – mine came from my local Michaels. I’d highly recommend that you get the fill locally, so you can see the quality before you buy.
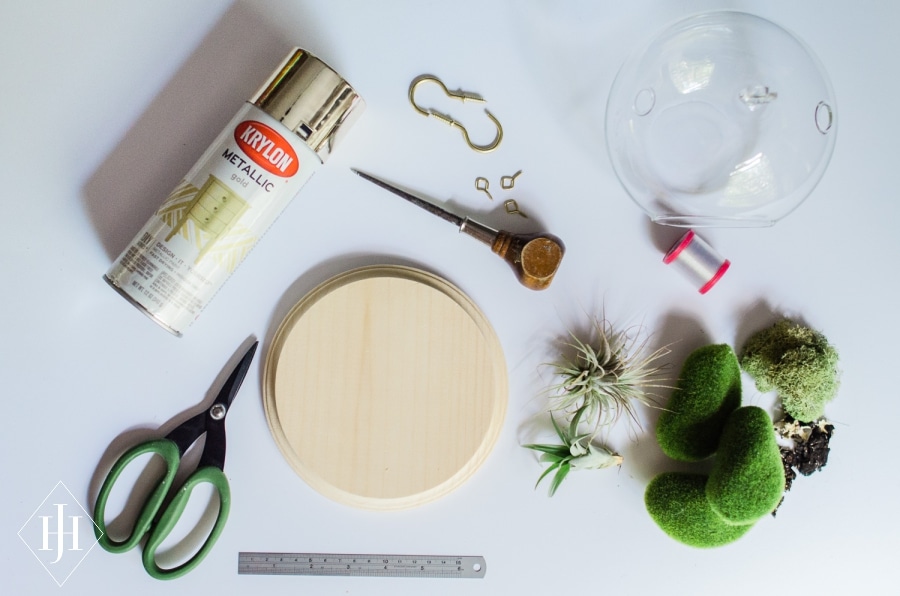
Tools:
- Spray paint or wood stain (optional)
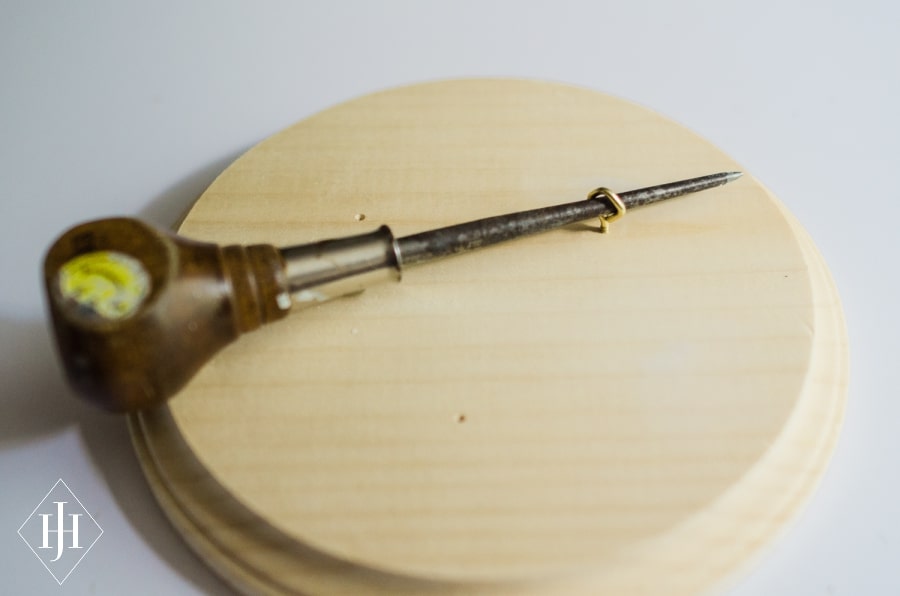
- Awl or small Phillips head screwdriver
- Scissors
Let’s get started!
Step 1. Mark the wooden plaque with the location of your screw eyes. If you’re making the same three-globe terrarium I am, you’ll want to make sure your screw eyes are spaced evenly, and far enough apart so your globes won’t hit each-other.
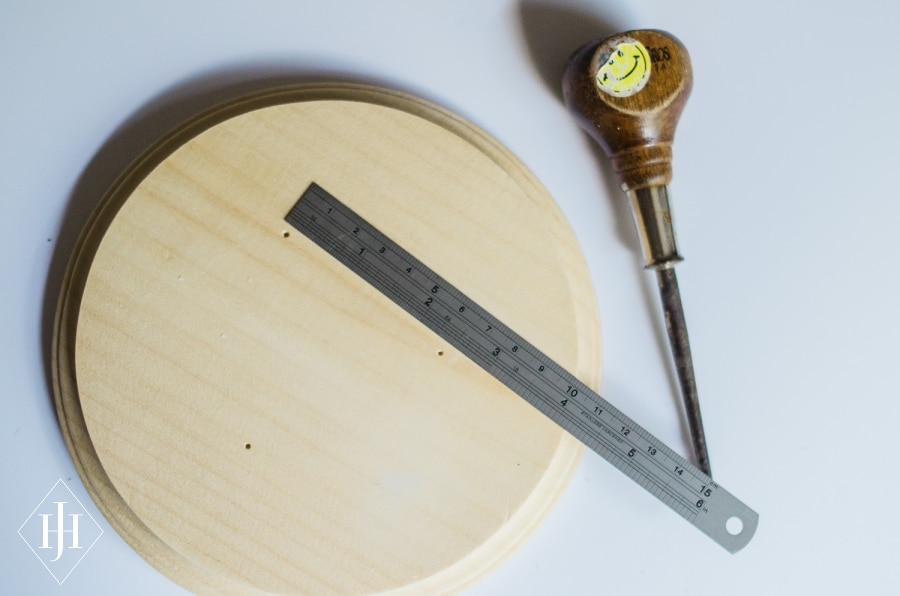
Step 2. Use your awl, or screwdriver, to start the screw eye holes on your pencil marks – this will help you see the marks after you stain or paint your plaque!
Step 3. Stain or paint the plaque your choice of colors! Make sure you do this in a well-ventilated area (your brain cells will thank you!)
Step 4. Once your plaque is dry, drive the screw eye into the wood at your marks using firm and even pressure. Once the screw eye is started into the wood, you can thread your awl through it and use that leverage to more easily turn the eye until it is firmly attached to the plaque and screwed all the way in. Repeat with your remaining screw eyes.
Step 5. Don’t forget to attach something to the top to help you hang the finished piece! It’s harder to do this after you attach the globes. This depends a little on what you’re attaching the terrarium to, but I used two brass cup hooks since I was attaching them directly to wood. To hang from a ceiling, you might want to consider a cup hook combined with a ceiling hook designed for drywall.
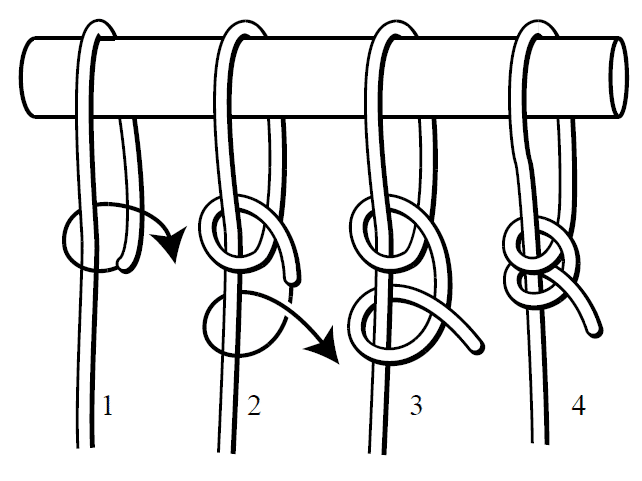
Step 6. Time to attach the globes. I used doubled-up invisible thread to make sure it could handle the weight, but fishing line would also work really well and wouldn’t need to be doubled.

Tie the twine onto the terrarium globe using a double half hitch knot. This is what that knot looks like! Then use the same knot technique to attach the globe to the plaque.
You might want to attach all the globes to the hanging thread first, so that you can easily compare the lengths from the plaque for a staggered effect.
Now for the fun part: hang, and decorate! For my fill, I used faux mossy pebbles, real moss, and eventually faux air plants. I also placed small rocks in each of my globes to make sure the hanging thread would stay taut and looking nice – depending on the weight of your glass globes and strength/stiffness of your hanging thread, you may need to do this as well.

Let us know if you try this project – how will you fill your terrarium globes? Though impractical because of how delicate it would be to make in advance and transport, I am sure this would make a killer wedding backdrop, or sweetheart table hanging chandelier!