

Images & Tutorial: Jenn Heller Design Co
Our DIY maven is back today, bringing us the awesome with this DIY copper pipe table number tutorial. And wait, there’s more! This is just the beginning of her DIY copper pipe series – so get excited people! Take it away Jenn!
—
DIY Tutorial: How to Make DIY Copper Pipe Table Numbers

I had avoided copper pipe as a DIY material for years, for several reasons that all ended up being completely false**. So now I am making up for lost time, and I have a bunch of fun copper pipe DIYs to share in the coming months.
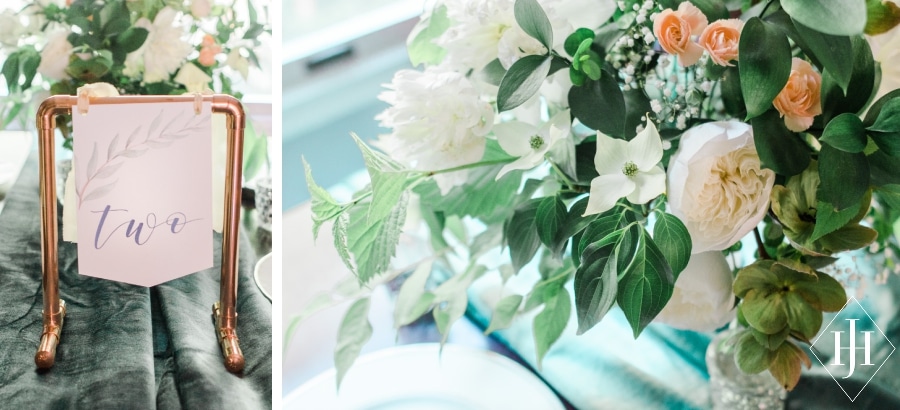
First up are these fun table numbers! There’s a dozen ways to personalize these to your liking – with the table number card itself, or dip or spray the copper pipe to add an accent color. You could easily make a larger version and drape with greenery to show off your signature cocktail menu, signs, or even extra large as a seating chart!
Details:
Time: about 20 minutes of active work + drying time. As ever, faster in batches.
Difficulty level: Easy peasy
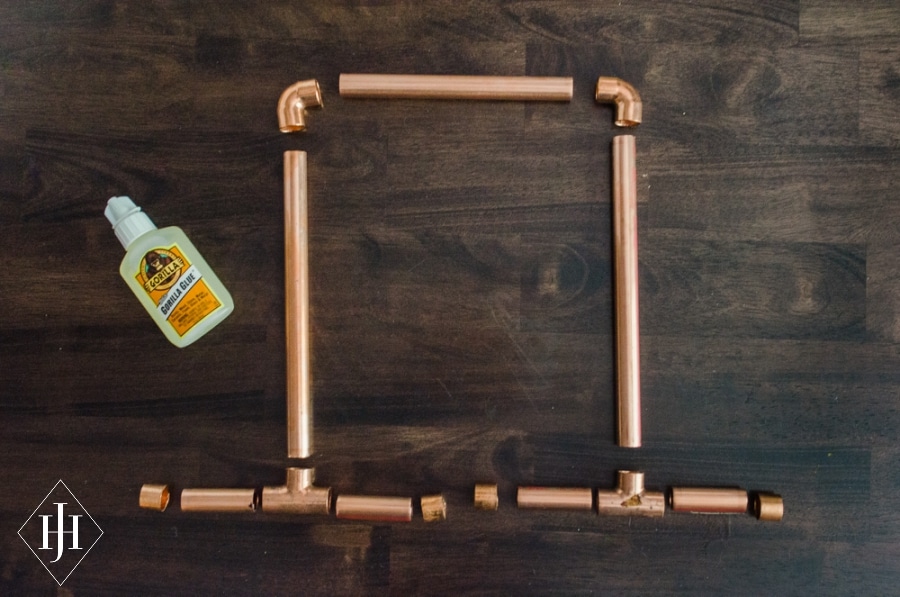
Cost: Buying fittings in bulk will greatly reduce your cost. Each table number uses 2 90 degree elbow, 2 tees, and about 24” of pipe without the feet. With the feet as shown, add 8” of pipe and 4 caps per table number – about $6.00 of copper.
What you’ll need:
Materials
- Copper pipe – ½” diameter is the most common and economical. Make sure you don’t pay extra for the heavy duty stuff – type M is fine
- Copper tee fittings for ½” pipe – a 10 pack will work well for table numbers but they also come in larger quantities for a larger discount.
- Copper 90 degree elbow fittings for ½” pipe
- Copper pipe caps for ½” pipe (optional)
- 5×7 Table Numbers on cardstock
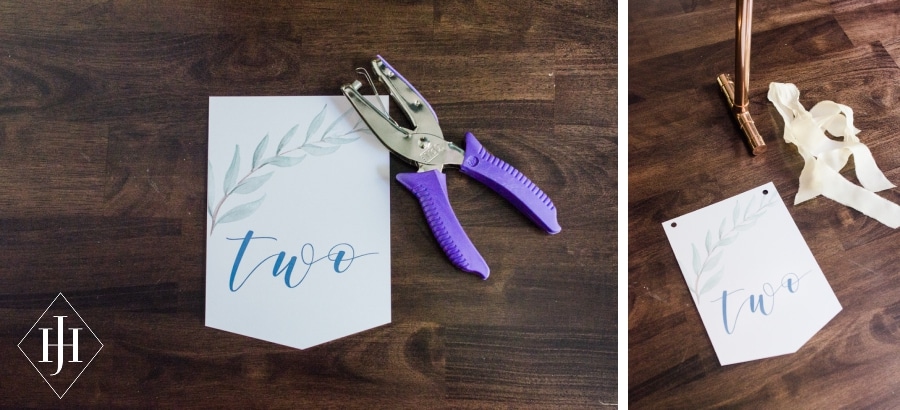
- Ribbon
Tools:
- Copper pipe cutter
- Marker and ruler
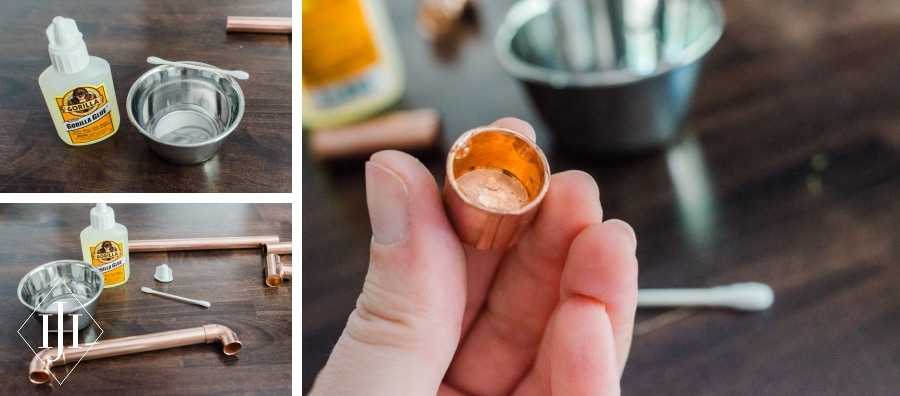
- Glue – I recommend White Gorilla Glue for this one.
- Holepunch
- Copper polish (optional)
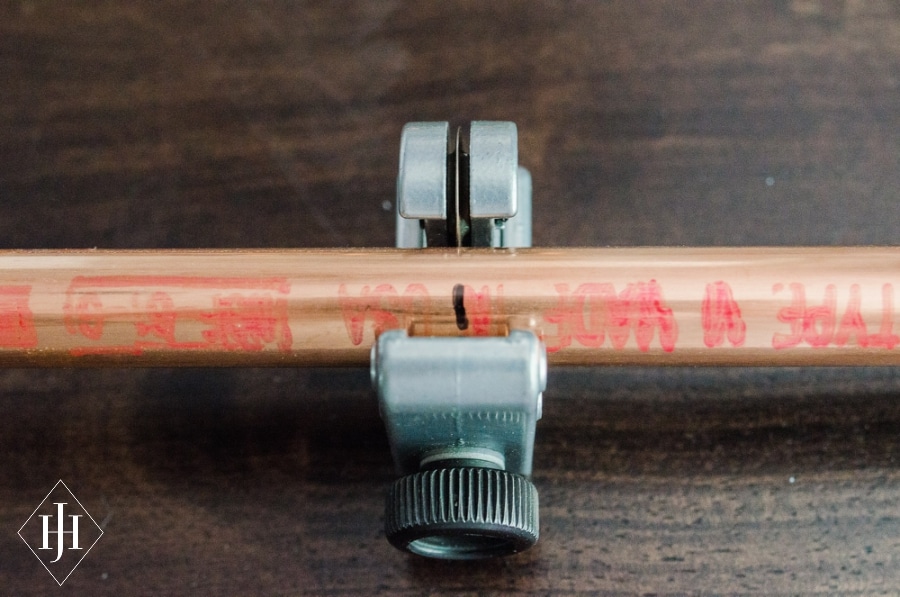
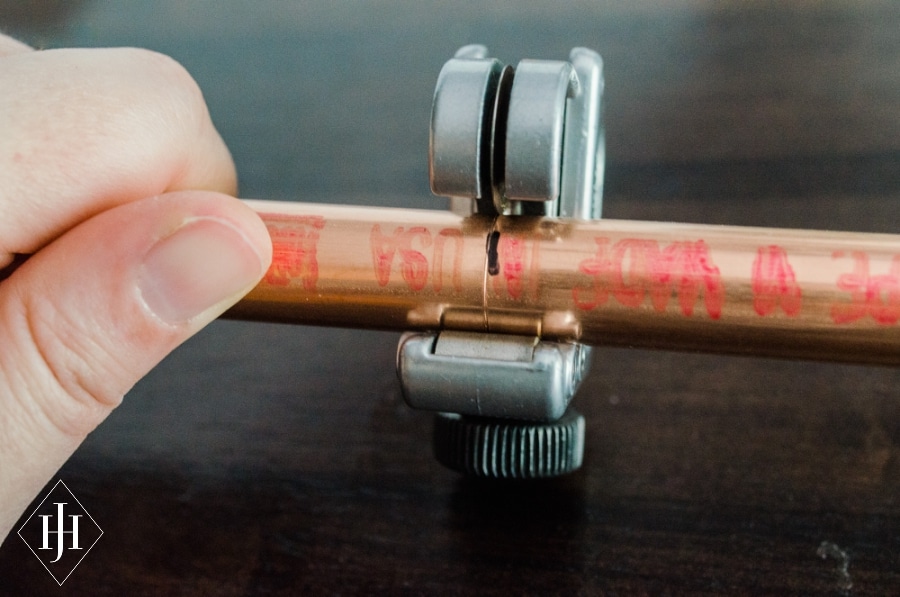
Step 1: Cut copper pipe to length using the pipe cutter – place the pipe in the cutter resting in the grooves, and tighten the screw so the blade is tight against the mark you want to cut. Turn the cutter around the pipe once, then tighten the screw slightly to move the blade forward. Repeat the turn+tighten until the pipe splits into two pieces.
You’ll need 1 piece for the top crossbar roughly 6” long, two identical pieces for the sides roughly 9” tall. For a more finished look (and greater stability) you can also cut four identical feet pieces for the base at roughly 2”.
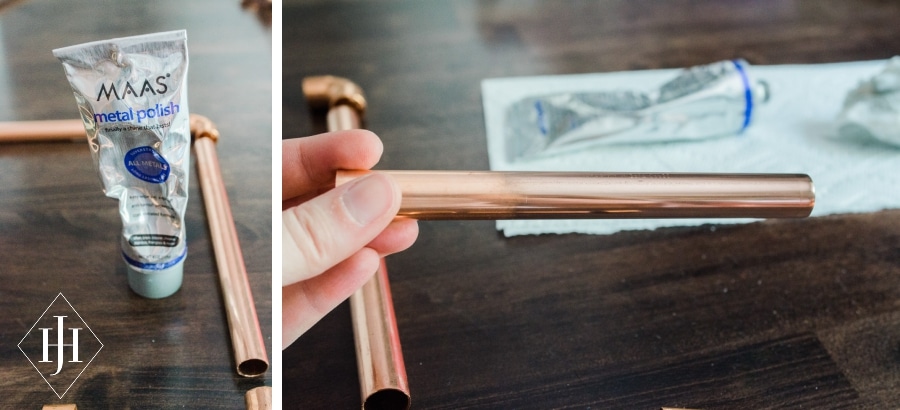
Step 3. Polish the copper pipe and fittings before gluing, if you want it polished. I find it gives a really nice rose gold look.
Step 4. Glue together the top half. I use white Gorilla Glue, which wants you to dampen the surfaces – a que tip works great for this. I apply a small amount of water, then four drops of glue, to the inside of the fittings. Then press the pipe in and give a little twist to spread the glue around the sides. Repeat this for the other elbow, and press the assembled piece flat on the table to make sure it’s square and flat before leaving it to dry.
Step 5. Glue the caps + feet together to the tees for the base, if using.
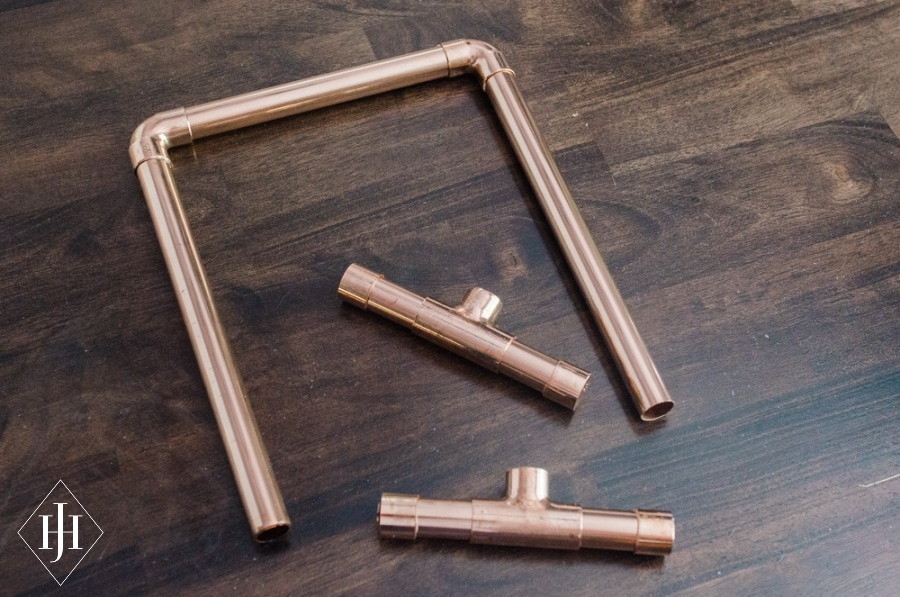
Step 6. At this point your copper frames are ready to go to your venue with the feet still separate – this minimizes the chance of the frames racking and twisting and leaves them compact for easy transport.
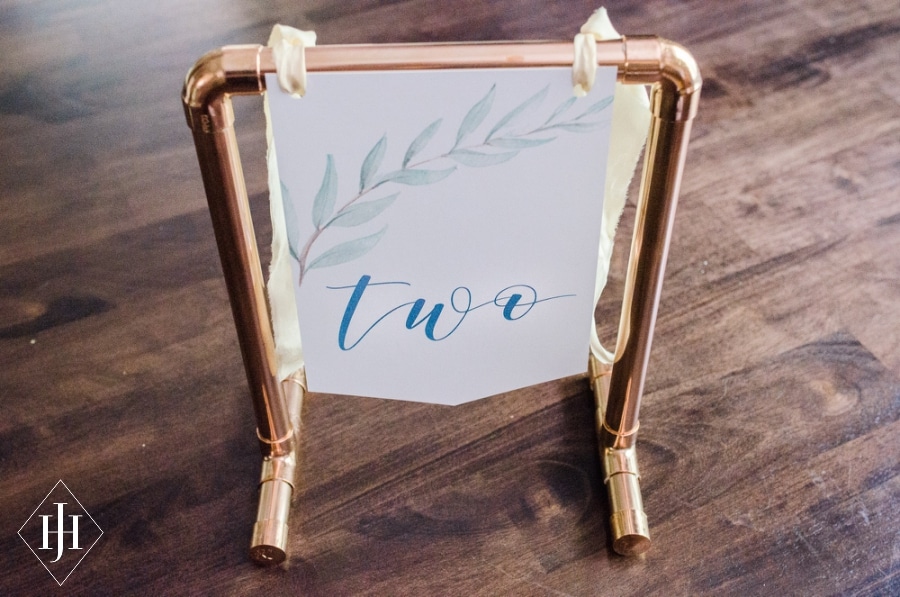
Step 7. To hang the numbers, use a hole punch to make holes in the top of your table numbers and thread with ribbon of your choice. You can tie a bow or leave the ribbon ends long, which is what I opted for in this case. If ribbon is not your thing, you could use metal split jump rings for keys for a more industrial finish.
** Perhaps you’re interested in my false assumptions about copper pipe? I thought it was a) super expensive, b) hard to cut, and c) needed to be soldered. Wrong, wrong, and wrong (unless you need the seams watertight.)
—
This post contains affiliate links.


2 comments
I love this…looking for piping that makes it less than $6 each just for that element and can’t find it. Would you please share where you ordered it the cheapest I could find it was at jet.com and that is $5.53 per build.
Could you please share where you purchased the Copper pipe – ½” diameter.