
We’re back with another amazing DIY tutorial thanks to Ribbons & Bluebirds. If you haven’t yet checked out her awesome DIY scratch-off tutorial OR her custom, FREE wedding party invitation printables, do that first. Then come right back here, because we have an awesome 3-in-1 for you today!
Introducing: 1 Napkin, 3 DIY Wedding Projects!
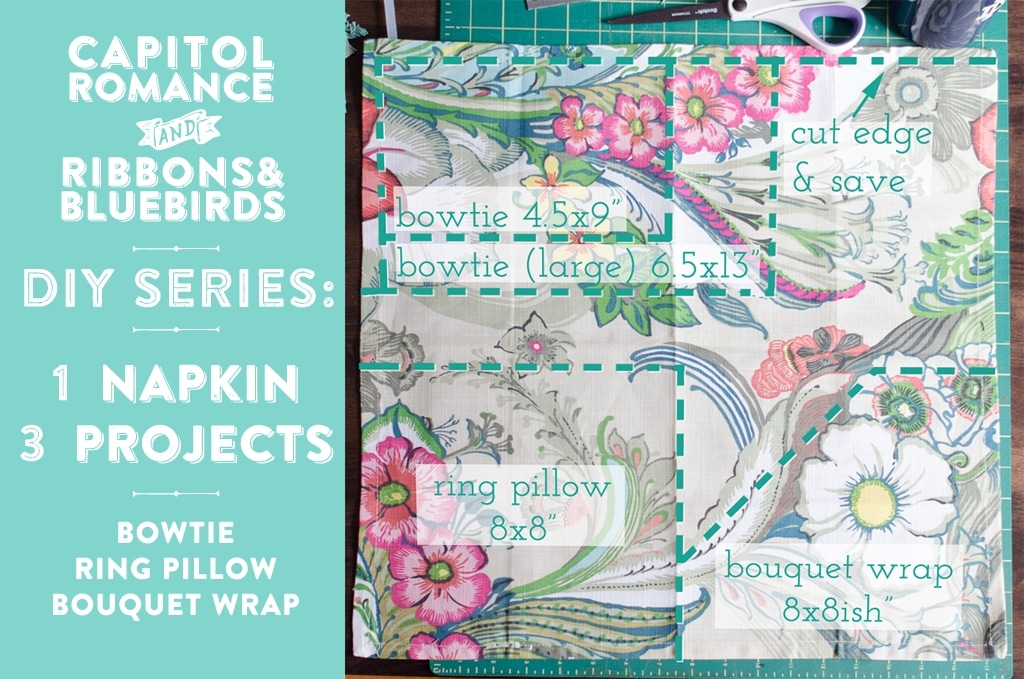
Up first for today, the DIY Bouquet Wrap. Find the DIY Fabric Bowtie tutorial here and the DIY Ring Bearer Pillow tutorial here.

What you’ll need:
- 1 fabric napkin, at least 16×16” square
- Iron & ironing board
- Hem tape (optional)
- Ribbon, pin, or twine for finishing
- Some pretty flowers!

This one is nice and easy, and is a perfect way to polish up your bouquet if you’re DIYing your own flowers. The trick is to let the napkin hems do the hard work for you, and just use your iron to keep the other raw edges neat.

INSTRUCTIONS:
Cut a square out of one corner of the napkin, keeping a hem on two sides. If you look at the fabric as a diamond shape with the hemmed edges as the “bottom”, cut off the top, left, and right points of the diamond. The result will look just like a baseball home plate.
Use your iron to fold over the top raw edge and press to create an open hem. Pick your left or right raw edge to be your “finished” edge, and fold over and press a small hem there too. Clip the corner where the two pressed seams overlap to avoid a bulky fabric mess and to help everything lay flat. If you like, you can finish the side hem with no-sew hem tape to make sure it won’t unravel during some intense bouquet-throwing wedding day action.
To wrap your bouquet, lay the bouquet on top of the wrap and fold in the sides, starting with the edge you left unfinished. Wrap the finished edge over and secure with your choice of ribbon, twice, or a pretty pin.

Easy – and SO awesome right!? Totally going to be using this DIY tutorial for future styled shoots & passing along to all my clients doing DIY flowers! Check back next week for Part 2 of this series!
[icon size=”small” image=”icon-heart”]


4 comments
What a great idea! I’m going to have to look for a few napkins I like and try this out!
so glad you like it Maureen! :)