
We are so insanely excited to announce a new partnership on Capitol Romance! Introducing the lovely Jenn with Ribbons & Bluebirds ~ a beautiful, stationery, design, & other superb paper products, company out of Virginia. Jenn is the ultimate jack of all trades and she is also a DIY goddess, so we are insanely pumped to be hosting some DIY tutorials, free printables, and other helpful posts from her here on the blog. Up first is an awesome DIY tutorial for making a Snow Globe Ornament (or gift tag!). Take it away Jenn!
DIY Tutorial: How to Make a DIY Snow Globe Ornament or Gift Tag

These festive snow globes can make easy tree ornaments or gift tags! They’re also a great way to find a use for your favorite photos that didn’t quite make your holiday card, to share with family and friends – it is quite likely you have some of those maybe from an engagement session, or maybe some of those gorgeous wedding photos?
What you’ll need:

- A stack of your favorite photos (4×6 work great)
- Sheet of acetate film OR vellum for a less translucent look
- Colored cardstock backing – shown is PaperSource cardstock in Cement
- Snowflake stamp of your choice, small
- White chalk inkpad*
- White gel pen
- Large circle punch, 3” – available at Michaels and probably other craft stores
- Paper glue of your choice – I prefer 3M Super 77 Spray Mount (if you have a ventilated space to spray in). Rubber cement or a glue stick also work.
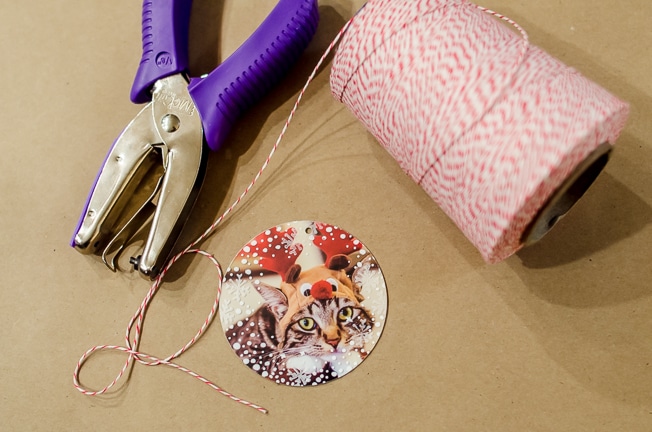
- Small hole punch
- Ribbon or twine
Start by cutting out a circle of your cardstock backer using the 3” punch. Place the cardstock circle underneath the acetate, near enough to an edge that your punch can reach – this will clearly show you the outline of your circle while you embellish it.
Now it’s time to get the acetate all dressed up! Using your snowflake stamp and your chalk inkpad, start building up layers of “snow” around the edges of your snow globe. Don’t worry about clumping them too much, as you will fill in any bare spots later with your gel pen. **DIY TIP** Why a chalk pad? The chalk ink dries more quickly on non-porous surfaces like acetate; using a pigment inkpad might mean your ink takes weeks to dry.)

For those of you thinking, “Hey, it would be so cool if I embossed these snowflakes!” – the acetate will melt under the heat gun. Trust me :) If you are SUPER CAREFUL you can use the heat gun from a distance to encourage the ink to dry.
After your stamped design has dried, go back in with your gel pen to create little snow swirls, and smaller flakes. If you are a sparkly fan, this would be the time to add tiny dots of craft glue and some glitter! Just be cautious about the drying time of glues – **DIY TIP** ZipDry glue is a great fast-dry option for those whose craft-mates are children (or cats.)

While your snow globe is drying, you can finish up the rest of the tag. Take your stack of photos and cut out 3” circles, looking photo-side-up at the bottom of the punch to make sure it is centered how you would like. Once punched, use your glue method of choice to attach the photo to the cardstock backer. **DIY TIP** If using spray glue, use gentle soft sprays onto the photo back to prevent wet clumping, and then carefully position the cardstock backer on top and press down lightly.

Allow the glue to dry, then write a message on the cardstock backer. If you’re like me and always looking for places to practice your calligraphy, this is a great opportunity!

Once both halves of the snow globe are dry, put them together and punch a small hole in the top for your ribbon or twine. Tie a loop, and your tag is done!

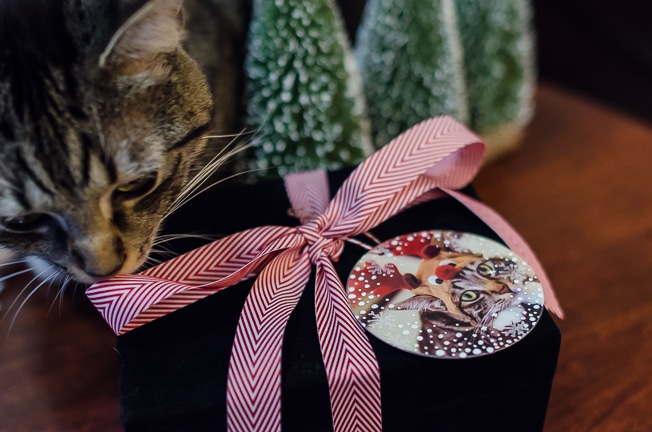
Voila! Let us know if you use our tutorial to make your own DIY snowglobe ornaments or gift tags ~ we’d love to see them!
[icon size=”small” image=”icon-heart”]


3 comments
Saving these for next year! What a great DIY post :)
Totally! I might need to try too – or maybe do hearts for a Valentines-inspired one! :)
Cute, cute! Great post!