

Tutorial & Images: Ribbons & Bluebirds
Our house is covered in plants. My husband is obsessed with succulents & house plants and while I do love me some green foliage (and what it does for your air quality) we are running out of floor space for all the plants! Enter Ribbons & Bluebirds’ ah-mazing DIY Plant Hanging Rail tutorial – a perfect way to bring the outdoors in, without taking up any floor space! Take it away Jen.

Spring!!! Spring is finally here, and with the nicer weather comes the return of lush green for your garden. But, you don’t have to wait for nice weather for a splash of greenery in your home, and with this tutorial you can infuse a little colour year round.
I have a confession: I do not have much of a green thumb. I have too many projects on the go at any given time to remember to water them consistently and between my neglect and the constant attention (read: attacks) of my feline houseguests, plants rarely thrive around here. In addition, many plants are toxic to both cats and babies, neither of whom have the good sense to not chew on them, so I knew that part of my plant-craving solution had to be to keep the plants up and out of harm’s reach, and requiring no maintenance. So for my tutorial, I placed the rail up a little higher than you may wish and used arrangements of fake succulents, however I think this same concept would be killer in a kitchen to hang herbs!
** NOTE** My lengths are based on spacing of studs in my wall, at 24” on center. BEFORE YOU BEGIN OR PURCHASE MATERIALS you should determine the stud spacing on the wall you’re intending to use: you need to be able to hit at least 2 studs to properly hold up this rail without trusting to drywall plugs.

Materials, *should* all be available at your local hardware store:
- 18” section of ½ dia. basic black pipe, threaded at both ends
- (2) floor mount plates for ½” dia. pipe
- (2) 90deg. elbows for ½” dia. pipe
- (2) 3” straight connectors for ½” dia. pipe
- 1×4” pine board
- (8) ¾” #8 screw\
- (4) 2 ½” #8 screws
- Spray paint (optional)
- Wood stain (optional)
Tools needed:
- Saw
- Power drill and 1/8” drill bit
- Level
- Use a stud finder to find studs to mount the hanger on
Step 1. Start by cleaning and assembling your pipe pieces. Thread the long pipe into one end of each 90 degree elbow, and then thread the 3” extender into the other side. Make sure that when tight, you have a flat “u” shape, with both 3” pieces coming off of the elbows at a matching perpendicular angle to the straight pipe. Then screw the floor plates onto the end of the extenders, making sure that the whole assembly sits flat and (reasonably) level.
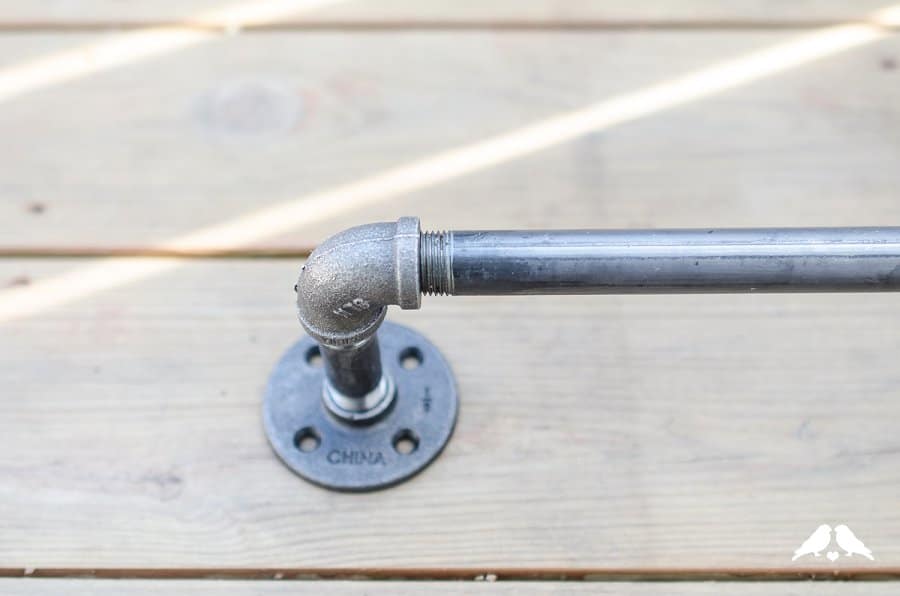

If you’re planning to spray paint your rail, go ahead and do that now and let the whole assembly dry.

Since my wall studs are at 24” on center, I needed the wood rail behind my pipe to be at least 25” long to hit one at each end. I cut my 1×4 to 25” long using a saw, and then gave it one quick coat of wood stain to better match the other furniture pieces in the room.


Step 2. Once both pieces are dry, it’s time to pre-drill holes for mounting. Pre-drilling holes is a great way to make sure that your wood doesn’t split when you install screws, and helps the screws go in much easier in general. This is especially important here if you’re going to be installing screws only ½” from the ends of the board like I am – the board would definitely have split without predrilling. I marked spots for drilling ½” in from the ends of the board, each 1” away from the top or bottom. Then, I lay my assembled pipe rail onto the board and marked holes for each of the 4 plate holes.


Remember how we used a tape flag to mark the depth to drill in the mesh lampshade DIY? Same deal here – I wanted to make sure that I didn’t go through the board for the pipe mounting holes, so I placed a tape flag ½” up my 1/8” drill bit. Once the tape flag was on the bit, I drilled all 8 holes.


Step 3. I decided to install the pipe rail onto the board before installing the whole thing on the wall, but if your stud configuration means some screws will be behind the rail once installed you may want to attach the board to the wall first. I used ¾” screws (#8 Robertson head wood screws) to attach the pipe rail assembly to the board. Then I pre-screwed the wall-mounting screws into the board, to save my scrambling and dropping screws while I was holding the piece up onto the wall for mounting – I was careful here to not drill through the board as I didn’t want to scratch my wall while I was possibly flailing around one-handed holding this thing up on the wall. I used 2 ½” screws (again, #8 Robertson wood screws) to mount the board to the wall.


Step 4. Use a stud finder to determine where your studs are in your wall (like I mentioned at the beginning, you may want to check this at the beginning here so you can plan for the length of your pipe rail and placement) and mark them lightly in pencil. Start by drilling one screw into the wall to hold one end fixed, and use a level to make sure your board is straight before you drive the rest of the screws in to hold the rail securely to the wall.


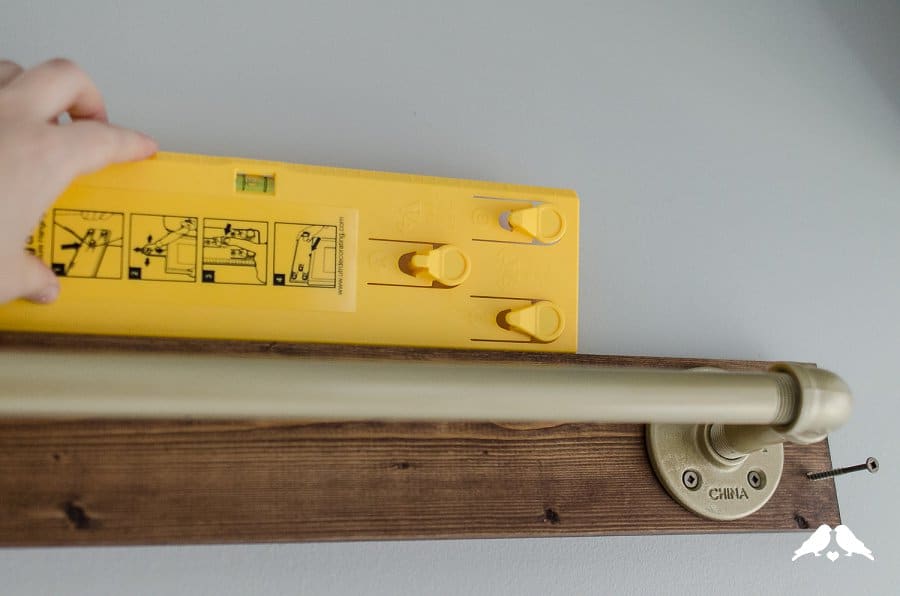

You’re finished!! Now have fun hanging plants (or anything else you’d like) off of it!

A special thanks again to Ribbons & Bluebirds for creating this AH-MAZING DIY tutorial.


