

[Images: Traci J Brooks]
Still need a gift for some co-workers or family members? Then our DIY tutorial from Ribbons & Bluebirds today has got you covered! Jenn is going to teach you how to make super adorable DIY mulling spice sachets – a perfect DIY holiday gift ideas!
DIY Tutorial: How to Make Mulling Spice Sachets ~ a Perfect DIY Holiday Gift!
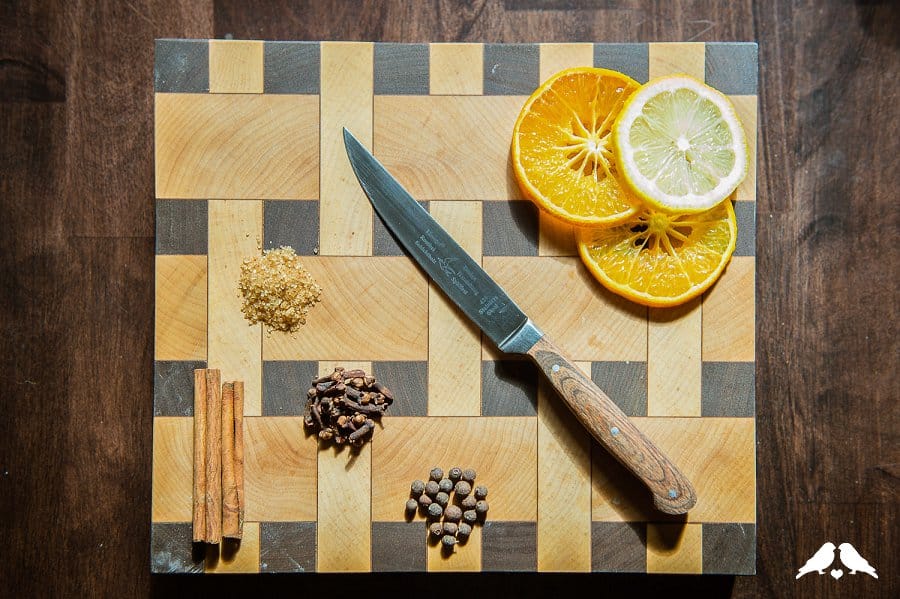
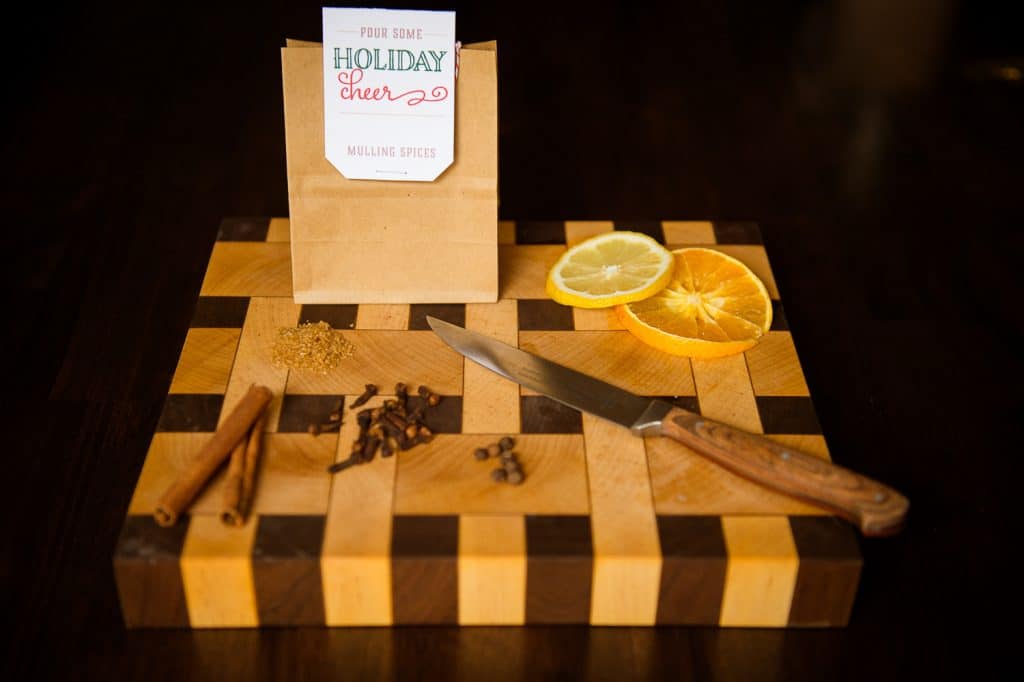
We are deep into the season of warm pick-me-up winter beverages, and one of my absolute favorites is mulled wine! My friends always put me in charge of preparing it when we have holiday get-togethers, so I had an idea this year of how to create a perfect pre-measured spice bag as a hostess gift! These sachets include all the spices (and instructions!) you need for perfect mulled wine except granulated sugar, and they’re ready for the recipient to literally drop into a pot of wine and start simmering!
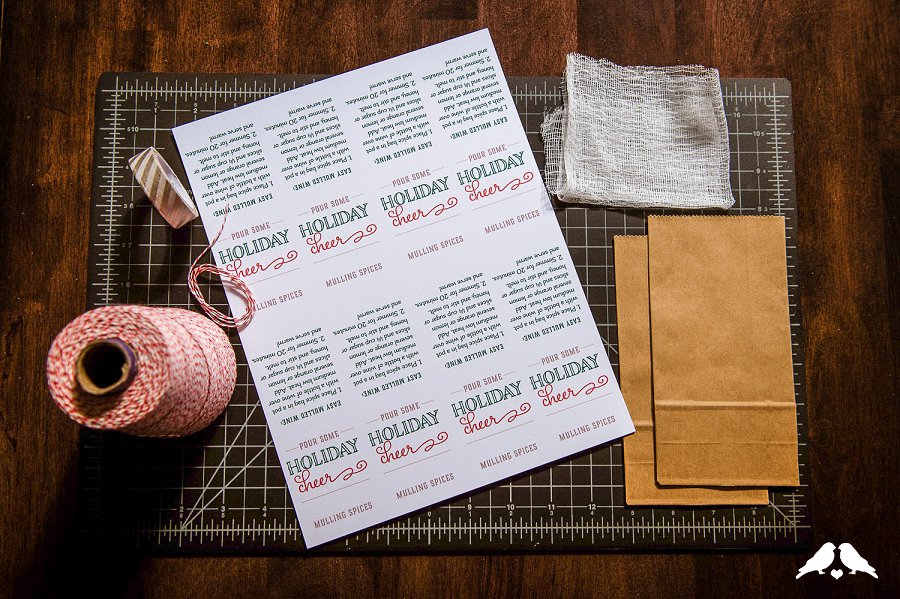
You’ll need:
- Mulling spices tag template, available here
- Spices, all whole: Allspice, Cloves, and Cinnamon Sticks
- Cheesecloth, which can be found at your local grocery story
- Corner clipper punch, optional (available at Paper Source or Amazon)
- Petite paper bags for final packaging
- Baker’s twine – food safe!
- Washi tape
- Stapler
- Scissors or X-acto
Step by Step Instructions:
Step 1: Download the tag template here – each sheet prints 8 tags on a standard 8.5×11 sheet. Start by preparing the tags – cut them down from the whole sheet into (8) 5.5 x 2” strips.
Step 2: Cut a section of baker’s twine long enough to float the spices in a large pot, and still wrap around the handle to prevent the tag from falling in. Tie a large knot at one end, and wrap some excess around two fingers to bundle it in a neat coil – this will be stored inside the tag until the spices are being used. Set the coiled twine aside briefly.

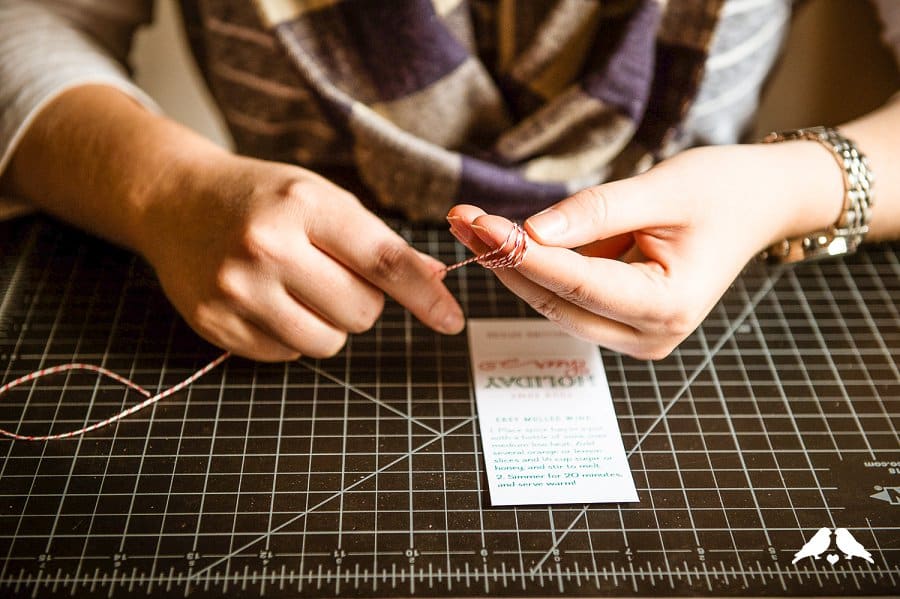
Step 3: Clip the corners of each unfolded tag, using either a punch or scissors. Fold the tag in half lengthwise – the tag should now remind you of an oversized tea bag tag. Place the coiled twine inside the fold, with the knot on the inside and the tail of the twine coming out the bottom of the folded card. Use a stapler to staple the two ends of the folded card closed, with the tail of the twine coming through the middle of the stapled section. If tugged gently, the twine should be able to slide out of the folded section.


Click inside for the rest of our DIY holiday mulling spices tutorial from Ribbons & Bluebirds!
Step 4: Now prepare the spice sachets. Cut a cheesecloth section about 4” square, probably double layered depending on how open the cheesecloth you’re using is. Place the following spices in the center of the cheesecloth (per bottle of wine) : 6 whole cloves, 1 cinnamon stick, and 8 whole allspice.


Step 5: Fold up the corners of the cloth to make a little bundle, and tie the center with the twine tail left from the tag to keep it closed.

Step 6: For your use at home, these sachets are done! But to keep it nice and clean for gifting (perfect to give alongside a nice bottle of red for your hostess) let’s package it up nicely in a paper bag :) I found some small kraft paper bags at Michaels, and simple cut the top off before placing the sachet inside. The excess twine will allow you to orient the tag right-side up – use washi tape on the back to attach the tag and you’re done!


Voila! I am REALLY hoping to find some extra time while I am home to make this for some last minute gifts for family and friends :) Thanks again to Jenn for another wonderful DIY tutorial! Let us know if you make some this holiday season :)

Images courtesy of Traci J Brooks.


