
It’s Wednesday! You know what that means – a super duper awesome rad DIY tutorial from the ever-amazing Ribbons & Bluebirds! Today Jenn is sharing some DIY goodness on how to fancy up your postcards, notecards, and envelopes by just using an eraser!! This would be a perfect DIY to gussy up your thank-you notes, your RSVP cards, or maybe even your escort cards. Really – the possibilities are endless! Take it away Jenn!
I love stamping as a great easy way to add embellishment to paper goods, but I don’t love that you have to actually buy a separate stamp for every design you might want. Enter the simple eraser stamp – finally those #2 pencils from your grade school days are useful again! Obviously this technique won’t work for more intricate (or large) designs, but it is so simple to grab a pencil and start stamping!
DIY Tutorial: How to Make Fancy Notecards with an Eraser Stamp ~ with step by step instructions!

Photography & Tutorial by Ribbons & Bluebirds
You will need:
- A pencil with rubber eraser (yes, a mechanical pencil would work!)
- Stamping ink pad (we like: Encore Ultimate Metallic Inkpad, Gold
)
- Blank notecards
- Embossing powder and embossing heat tool (optional. WOW! Embossing Powder – Multiple Colors
available here)
- Pen for your message

Step by Step Instructions:
Step 1: I chose a gold ink pad because I knew I wanted to use a gold embossing powder detail, but any colour will work! Press your pencil eraser into the ink pad – it may take a few dabs to get the whole top evenly covered. Then press onto your notecard, and voila! It is really that easy. Add stamped dots to the notecard in whatever pattern you like.
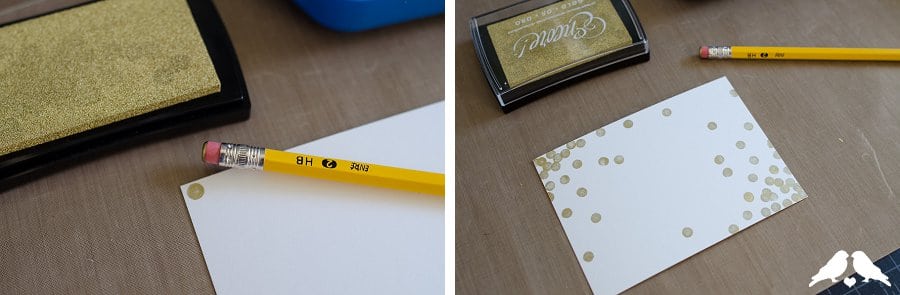
Step 2: To make the dot design I am showing, start in the corners with a few dots close together. As you grow the pattern outward from the corner, space your dots further apart to give a gradient look. Optional: to add extra emphasis and embellishment to the corners, sprinkle embossing powder over the corner dots within 20 seconds or so after stamping them. Tap excess powder off, and emboss using your heat tool.

Step 3: After your stamped design is dry, you can write a message on the front to complete your design, or leave it blank for multi-purpose use!

*BONUS TIP!!* You can also use an x-acto knife to create shaped designs in your eraser, like little hearts or stars. To create a shape, use a fine-tip marker to draw your desired shape onto the eraser. Then carefully cut away around it from the top down, then again around the edges to remove the excess eraser. Be careful using the x-acto so close to your fingers!

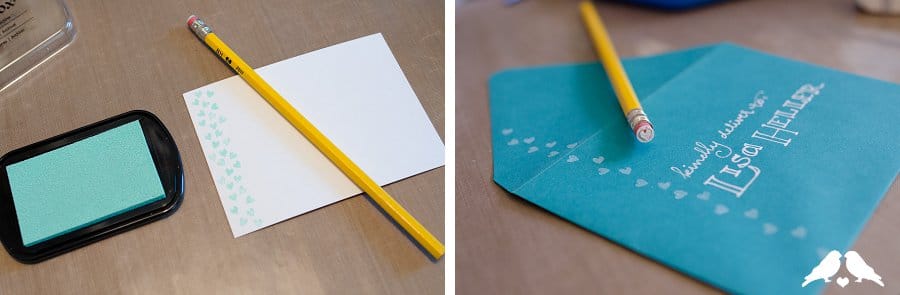
Don’t forget, a pretty envelope gets your recipient extra excited about your message :)

How EASY but AWESOME right?! I could totally see someone doing this for an awesome escort display or to fancy up their RSVP cards for sure! Thanks again to the awesome Jenn of Ribbons & Bluebirds for sharing today’s super rad DIY wedding tutorial! Let us know if you end up using our tutorial ~ we’d love to see your end results!


