While today’s How to Have a DIY Wedding advice post doesn’t contain a shirtless Ryan Gosling, I think you will find the advice and insight here just as useful as parts 1 and 2 of our “How to Have a DIY Wedding” advice series!
We started out explaining how much time is a huge piece of a DIY wedding and then we gave you some advice on how you will need to set priorities when it comes to your life and your DIY projects.
Now we are talking #3 ~ Consistency!

One of the easiest ways to keep your DIY projects easy to plan, fairly straightforward to execute, and looking good – is to keep your design elements consistent. Pick a certain item (or two) that you can use in many of your DIY projects and center all your projects around it!
How to keep things consistent: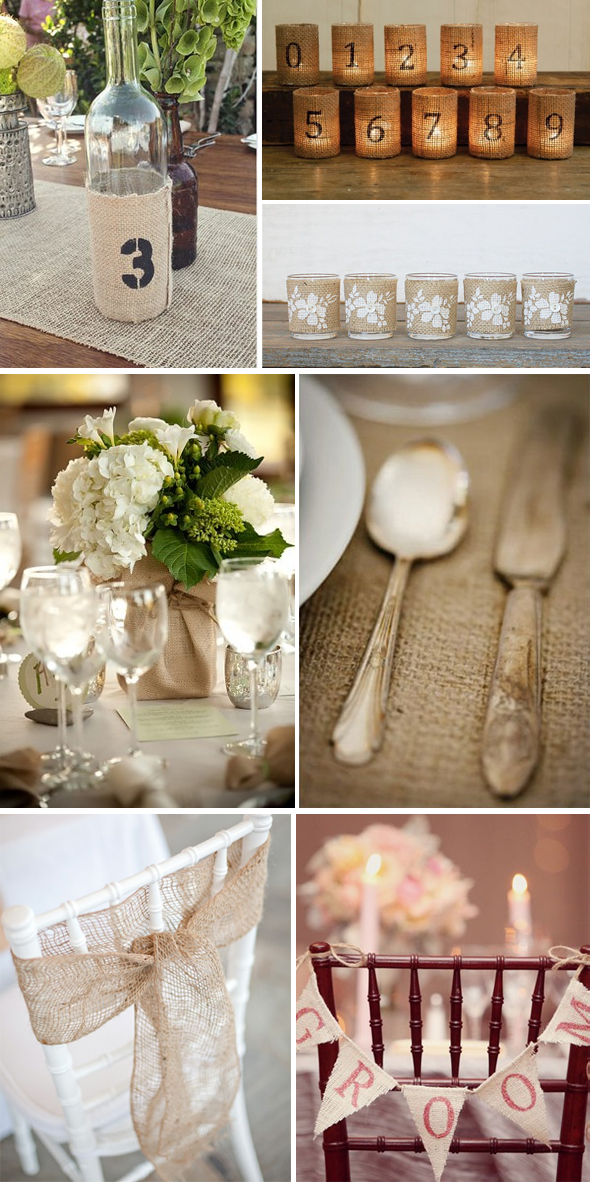
Step #1: Pick an element
- Buttons
- Paper Pom Poms
- Lace
- Burlap [inspiration on right by Jet Fete by Bridal Bar]
- Books
- Cameras or Film
- Yarn
- Sheet Music
Obviously the list of elements you could pick could go on and on – but some commons ones are listed above.
Elements for DIY projects should be generic enough that they can mold to your wedding theme (in color or style) but specific enough that they tie all the DIY projects of your wedding day together with some cohesiveness.
You could easily make bouquets, boutonnieres, centerpieces, seating assignment cards, favors, or decorations from any of the items listed above! Focusing on a specific element (or two) will also help you better prioritize your projects!
Step #2: Keep your colors & themes consistent
You will also want to keep your colors consistent (so pick a color palette early on!) and use it in your DIY projects. Personally, we used hot pink, black, grey, white, and polka dots. We used this color scheme for EVERYTHING so that the overall wedding had a more cohesive look.
Also be sure that you pick/use at most 2 or 3 “elements” ~ you don’t want to go crazy with the amount of items you through into your projects (and consequently your wedding) or things could not only appear messy or disorganized, but you could lose focus and make your DIY projects harder to accomplish!
I would say our elements were:
- Christmas Ornament Balls (in shades of black, silver and hot pink)
- The DC Skyline that we used on our paper products (invites, menus, program)
- Polka Dot Ribbon (to finish off our paper products, on the handles of the bouquet, on the boutonnieres, etc)
Step #3: Use the same font
Our font ~ Champagne & Limousines
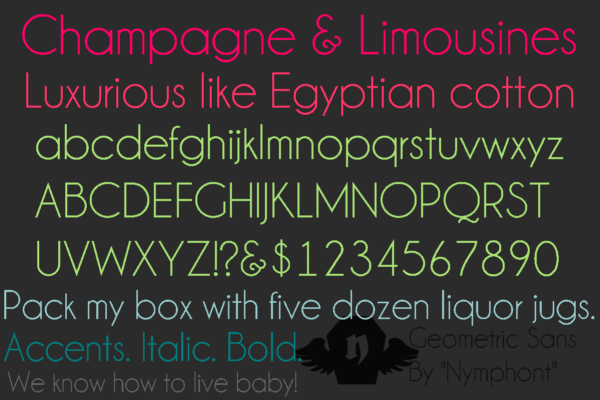
You will also want to pick a font in the beginning of your planning process and use it for whatever paper products you end up making yourself. We ended up making our save the dates, invitations, menus, table names, seating cards and wedding program poster – and most of our guests thought they were professionally made because of the consistency between all of them.
What element do you plan to use for your DIY projects? Do you have your color palette or font picked out yet!? If not, be sure to check out some of these websites for color inspiration and fonts:
http://www.theperfectpalette.com/
http://www.weswendesign.com/tag/font-friday
Feel free to share any other websites you might like for DIY wedding inspiration !


5 comments
Bree! I didn’t know you used Champagne & Limousines! I chose that as one of my wedding fonts too! Great minds think alike :)
Maria – LOVE it :) I can’t wait to see your projects/use of Champagne & Limousines … i love that font!