DIY Envelope Liners
When my husband and I started the invitation making process, I was all about keeping it simple. I was already freaking out about trying to design a map, announcement card, RSVP card, and labels. Andy, however, had other plans. We had seen envelope liners at Paper Source, and although I will admit that it gives the invitations a nice touch, they were just not cost-effective in my opinion. All that money for an envelope, whose main job is to hold pieces of an invite together, that guests just rip open and throw away? My practicality wouldn’t budge, but Andy’s determination stayed strong. I eventually caved on the idea, but was set on making them ourselves, with Andy taking the lead.
And that is how my husband found himself hand-making 100 envelope liners for our wedding invitations.
Thanks to other DIY blogs and endless Google searching, Andy was able to make the liners, and even I had to admit that the end result was really. freakin’. cool. (A couple of people even thought we had the invites professionally made!)
So without further adieu, here’s our advice and instructions for DIY Envelope Liners…
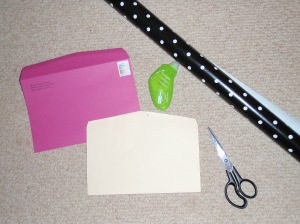
- 1 Manila Folder
- 1 Pair of Small Scissors
- Permanent Adhesive Roller (available at most craft stores)
- Wrapping Paper (in the design you want as the liner)
- An extra envelope that will be used for your invites
- Time, Patience, and a Steady Hand
 Step 1: Trace the outline of the envelope on the Manila Folder. Cut the shape out. Make sure the stencil fits into the envelope (you might need to trim it a bit shorter, especially at the top where the envelope’s glue is). Congratulations, you have now met your new best friend.
Step 2: Get ready to trace. Once you are happy with the stencil, start tracing that baby onto your wrapping paper.
Step 3: Cut. Each tracing needs to be cut out. This obviously takes time, patience, and a steady hand. A good idea might be to do 15 a night over the course of a week.
Step 4: Glue. Yet again, that time, patience, and steady hand, will need to come into play. First slide the liner into the envelope, then put adhesive on the envelope (the envelope is sturdier, the wrapping paper could tear). You really only need to put the adhesive at the top of the envelope since the rest of the liner is snug, down inside the envelope.
Step 5: Celebrate! You are done and your envelopes look fantastic!
I do have to say, that the envelope liner does add that “something extra” to your invitations. If you have the time, but not the money, then DIY Envelope Liners are certainly a great way to go.
Let us know if you used this post to make your own DIY Envelope Liners and how they came out!


