
[Images & Tutorial by Ribbons & Bluebirds]
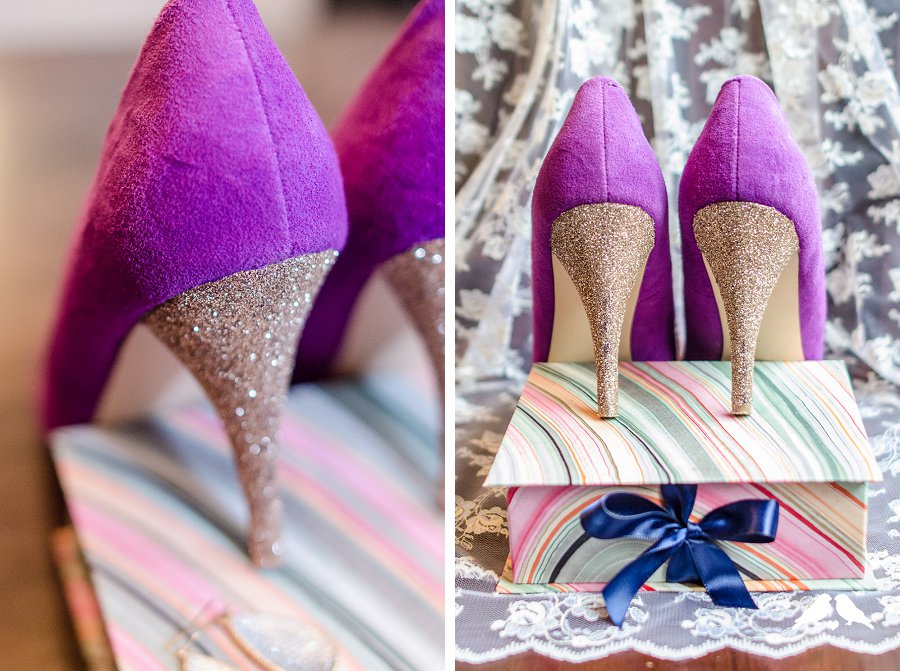
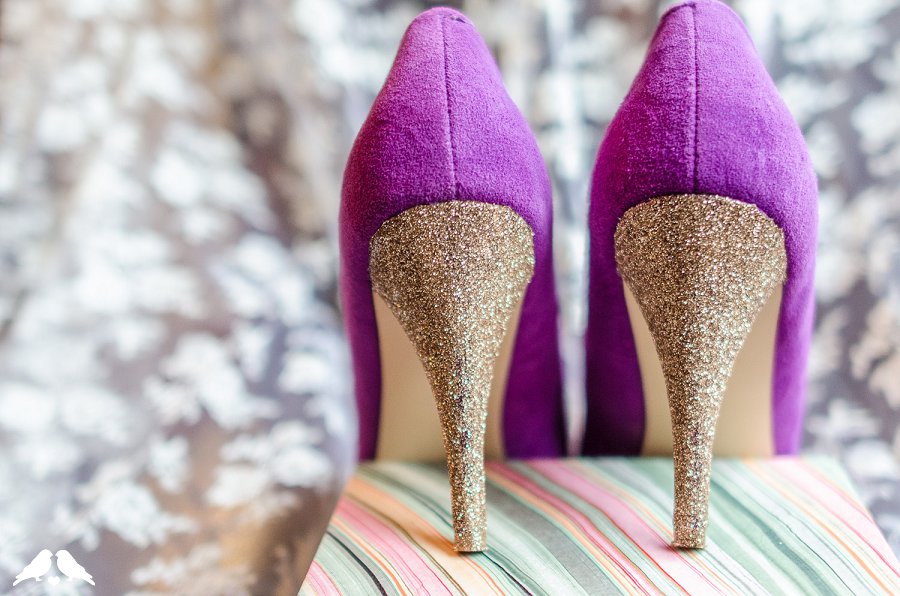
I’ve seen these beauties in more than a few “real wedding” features across the blogosphere, so when Jenn told me she wanted to take a stab at creating a DIY tutorial for Brides to create their OWN DIY Glitter Heels – well it was met with an astounding OH HELL YES. I, for one, could always use a little more sparkle in my life and I think this would be the perfect way for a bride or bridesmaid to snazz up her wedding day footwear – on the cheap! So check out the full, step by step, DIY tutorial below!
DIY Glitter Heels Tutorial
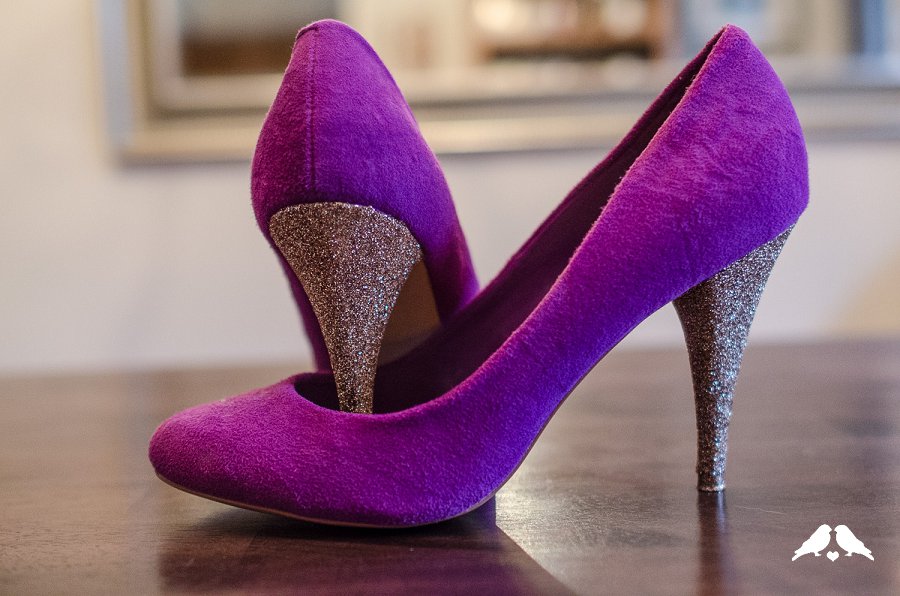
From Jenn: I love shoes. I have no problem admitting that I spent more money on my wedding shoes than on my wedding dress. I saw a gorgeous pair of fancy glittered heels on one of my favorite wedding photographer’s blog the other day and a lightbulb went off: I could make those!! And you’d better believe these hot heels are not just for enjoying on your wedding day – they can be for any day you want a shiny pick-me-up!
You’ll need:
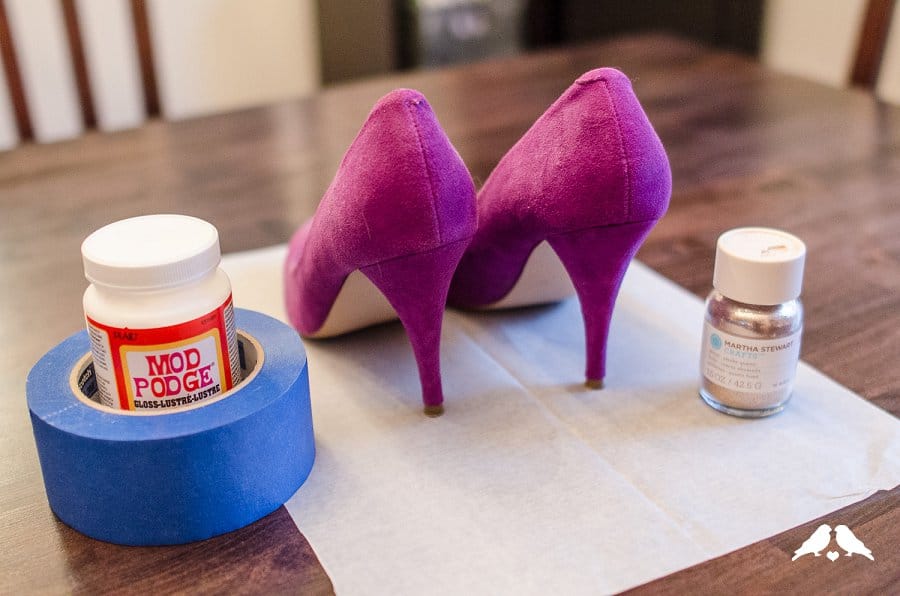
- One pair of heels (like these Style & Co Celine Womens Peep Toe Suede Pumps Heels Shoes
)
- Mod Podge
or your glue of choice
- Small foam brush
- Glitter sealer (We like this Krylon 6-Ounce Crystal Clear Acrylic Coating
)
- Masking tape
- Glitter
Step by Step Instructions:
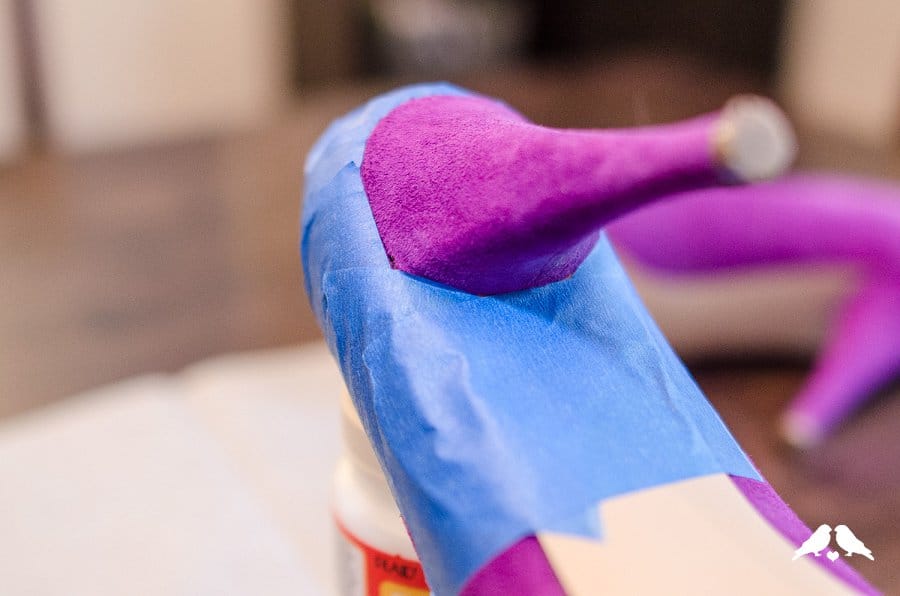
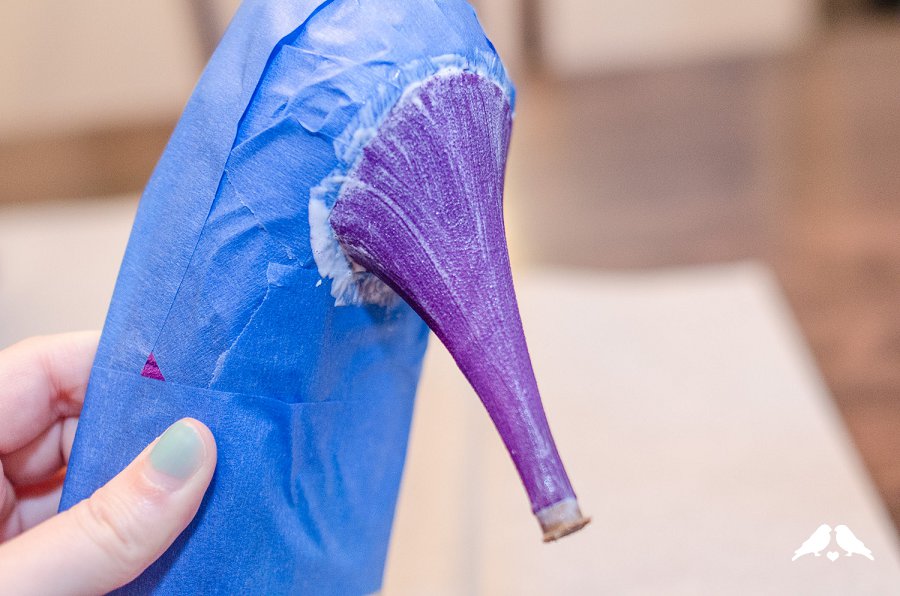
Step 1. Start by making sure the heels are clean – if they have any dirt on them you’ll want to clean them with a damp cloth. Using your masking tape, tape off the area you’d like to end up glittered. You could very easily extend the glitter all the way up to the rim of the shoe too – I just chose to do just the heel portion below the body of the shoe. Taping a little extra area will help protect the rest of the shoe from the glitter sealer overspray, so don’t be afraid to use a decent amount of tape.
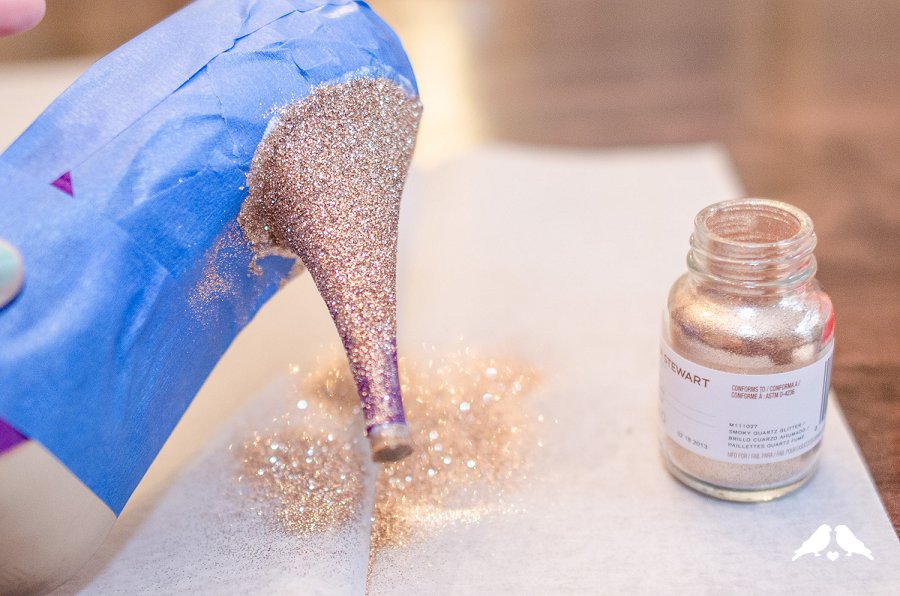
Step 2. Once you have masked off your glitter area, apply your glue with the foamy brush. Sprinkle the glitter on right away, and tap the heel to knock off any excess glitter. Make sure you coat the heel evenly!
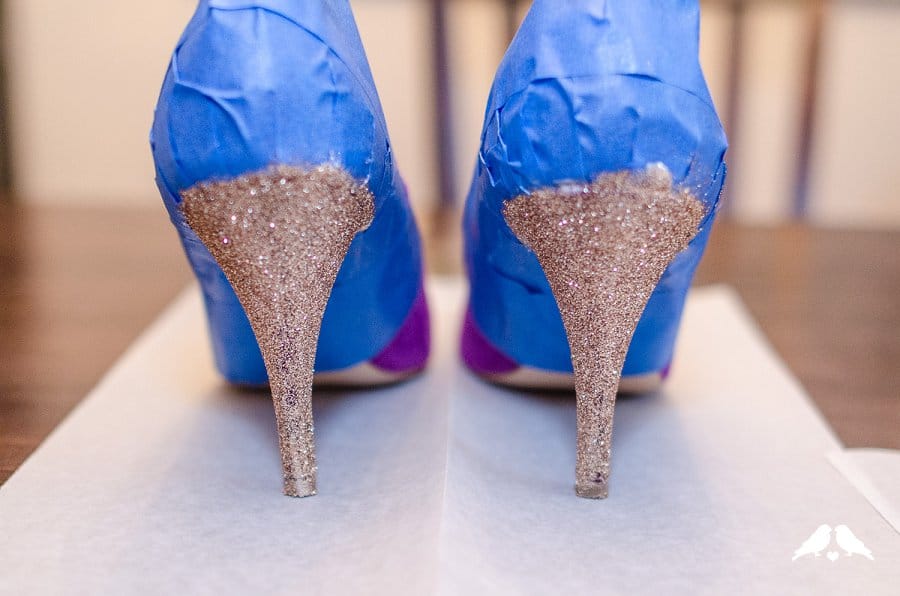
Step 3. Let the glue dry for a few minutes before coating the glitter with spray sealer.
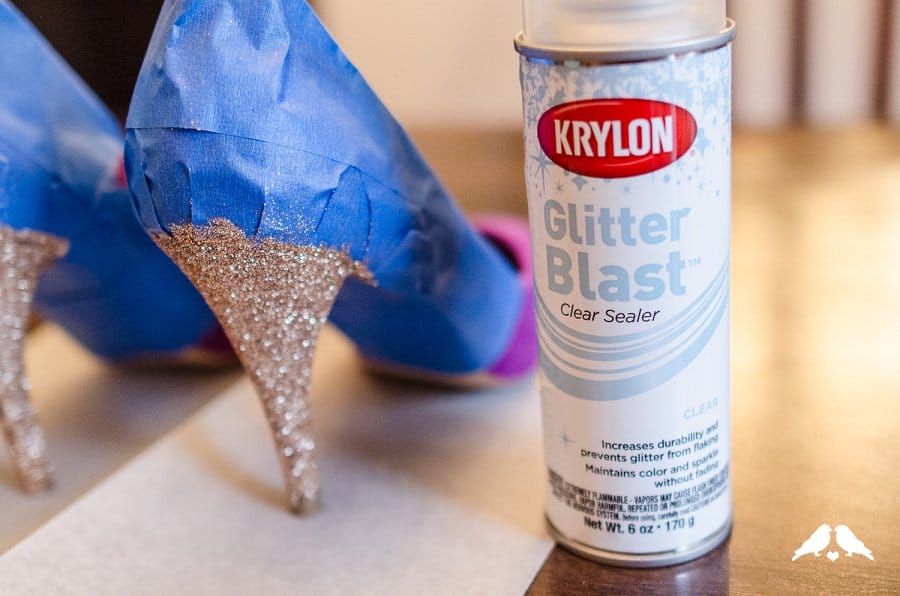
After the sealer dries, carefully remove the tape and you’re done!

Alright Romancers! Show me those DIY Glitter Heels!!!!!! Thanks again, as always, to the fabulous Ribbons & Bluebirds for creating such an AWESOME tutorial. Be sure to check out her Etsy shop & design skills for your holiday card needs this winter!


1 comment