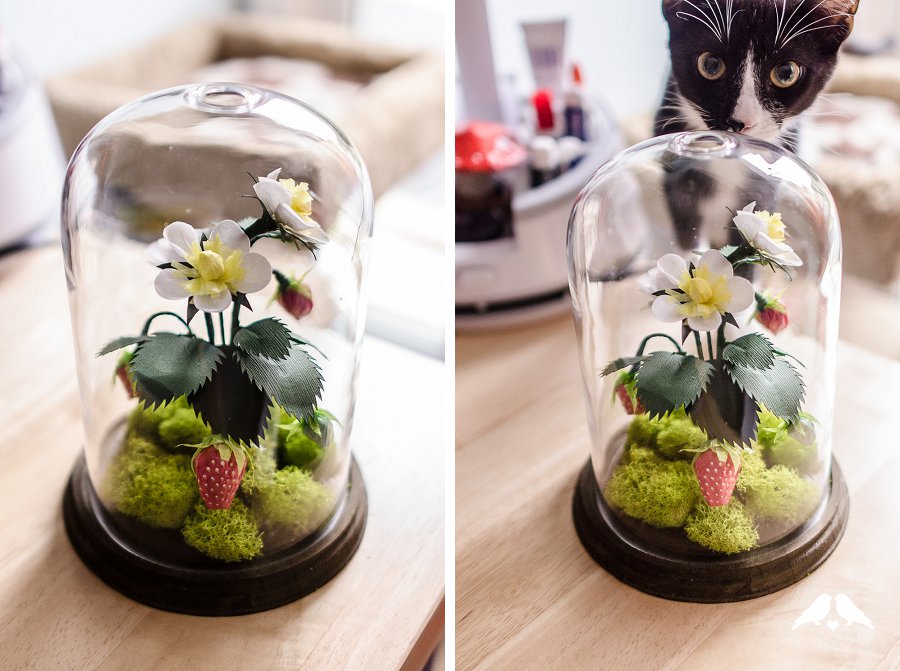
We love paper flowers as much as the next person, but today’s DIY tutorial from Ribbons & Bluebirds is something extra special and cool to do with paper – paper strawberries!! Jenn shares, “Well, summer is officially over – but that doesn’t mean you can’t have strawberries all year long! I have been enjoying all kinds of paper flowers recently, but I wanted to think of something that was unique and summery and came up with the idea for these cloche terrariums.” Excited yet?
How to Make a DIY Paper Strawberry Terrarium Centerpiece
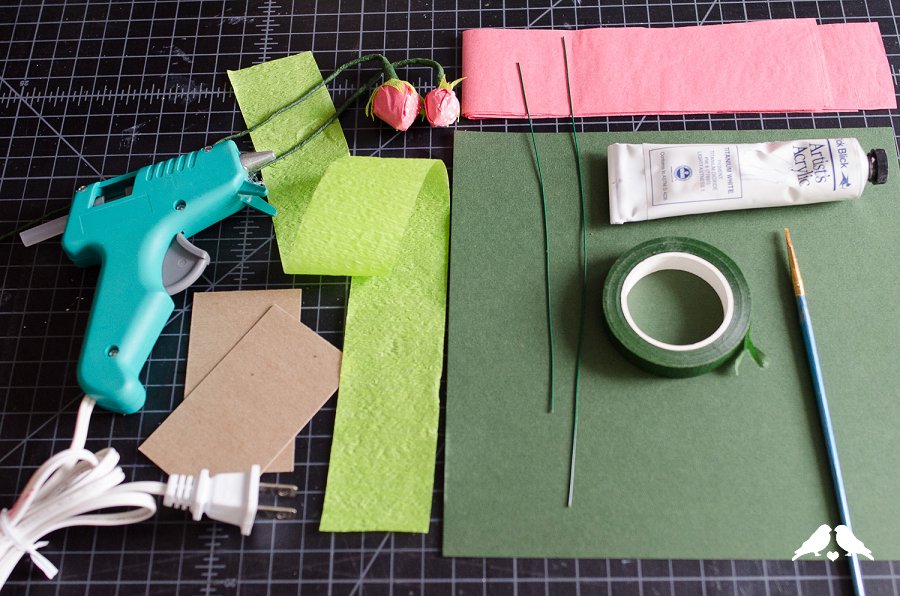
Materials you will need:
- Tissue paper in white, yellow, strawberry red, and pale green
- Lime green crepe paper (or tissue)
- Green cardstock
- Wire
- Modge Podge gloss sealer
- White and brown/gold acrylic paint
- Florist tape
- Hot glue gun
- X-acto knife
- Scissors
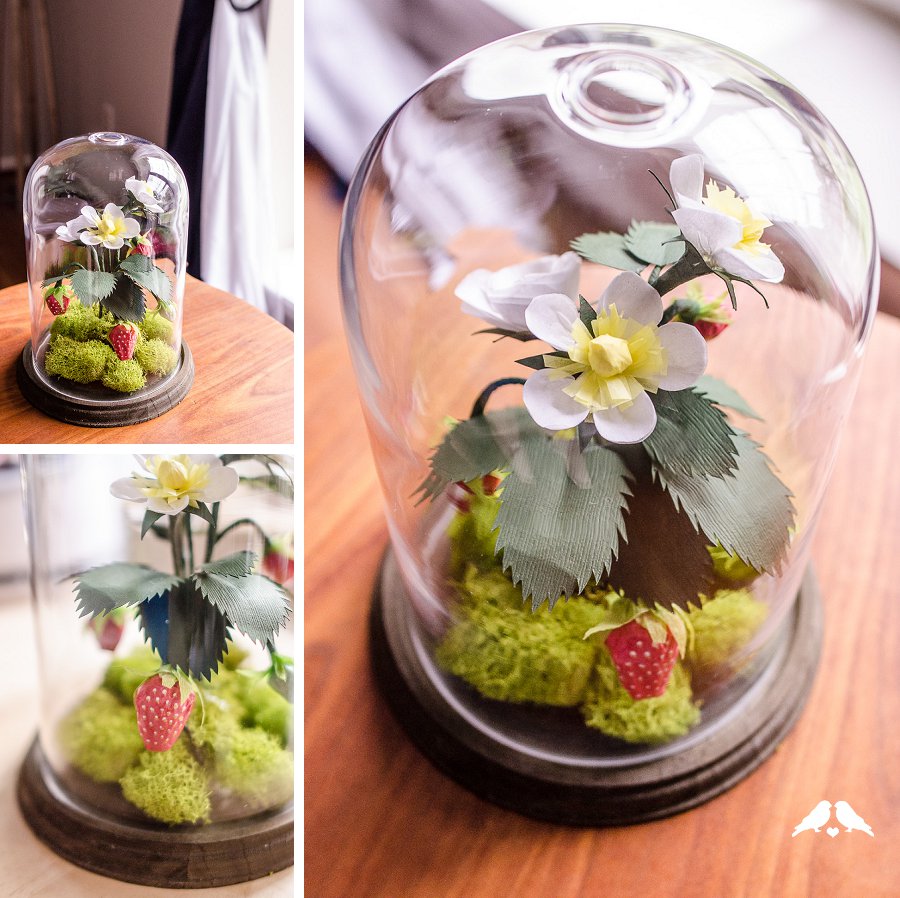
- A cloche or upside-down vase for presentation. (Like this Plymor Brand Glass Doll Dome with Walnut Base – 4″ x 7″
)
- Template for leaves and petals, printed on cardstock, found here.
Bear with us because this is a long one, but none of the individual pieces are difficult!
*Tips for working with floral tape* – Floral tape is only sticky once stretched – you will want to pre-stretch the beginning of each tape segment to get it to stick right away. The rest of each piece should be held tightly and stretched as you wrap, to maximize stickiness on the wire and minimize glue on your fingers.
For the strawberry blossoms:
Step 1: Begin by cutting out your cardstock template. For the blossoms, you will need the petal template and the “star”.
Step 2: Cut a 1” wide strip of white tissue paper with 4 layers, at least 5” long. Cut this strip into 5 1” squares (each 4 layers of tissue). Hold one stack firmly with your thumb, lay the petal template on top, and cut out the petal shape with scissors. I find that the x-acto knife tends to drag and tear the tissue, so scissors will work better here. Continue to hold the stack firmly as you rotate to cut the petal – this will help stop the tissue layers from shifting.
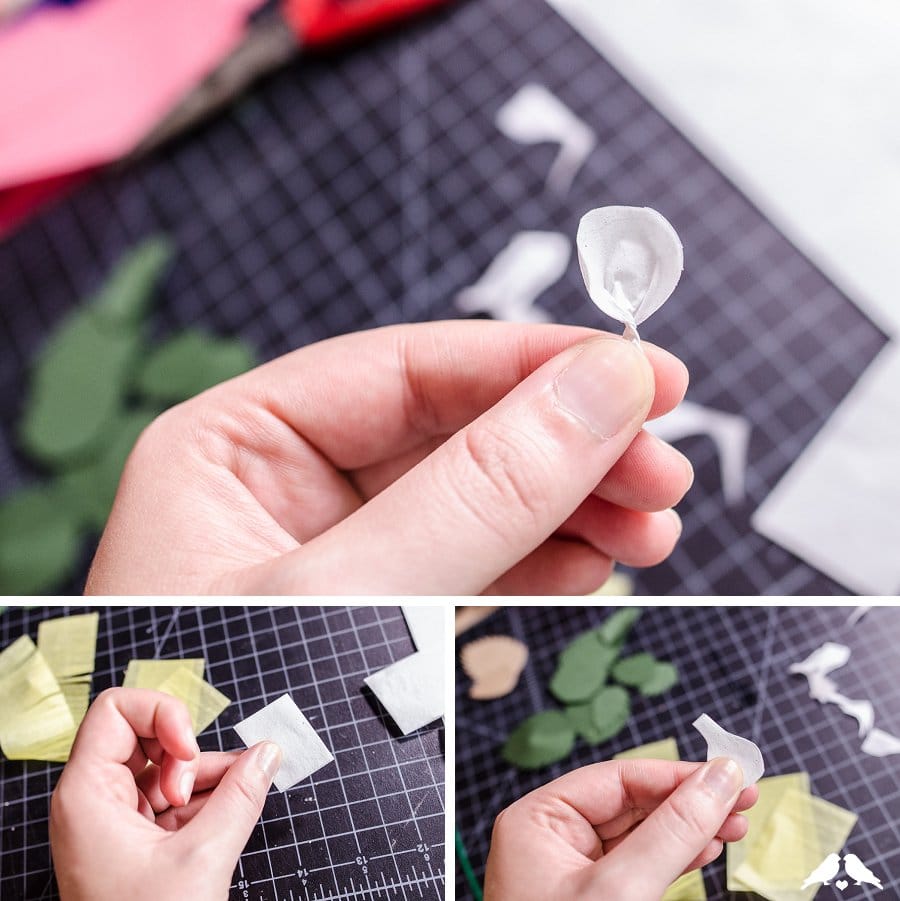
Step 3: Once you have your petal cut out, continue to hold firmly with your thumb towards the “stem” of the petal. Using your other hand, twist the stem of the petal while using your thumb to encourage the tissue to crease into a cup shape – the twisted base will keep the layers of tissue in place without separating. Repeat 4 times, for 5 petals total.
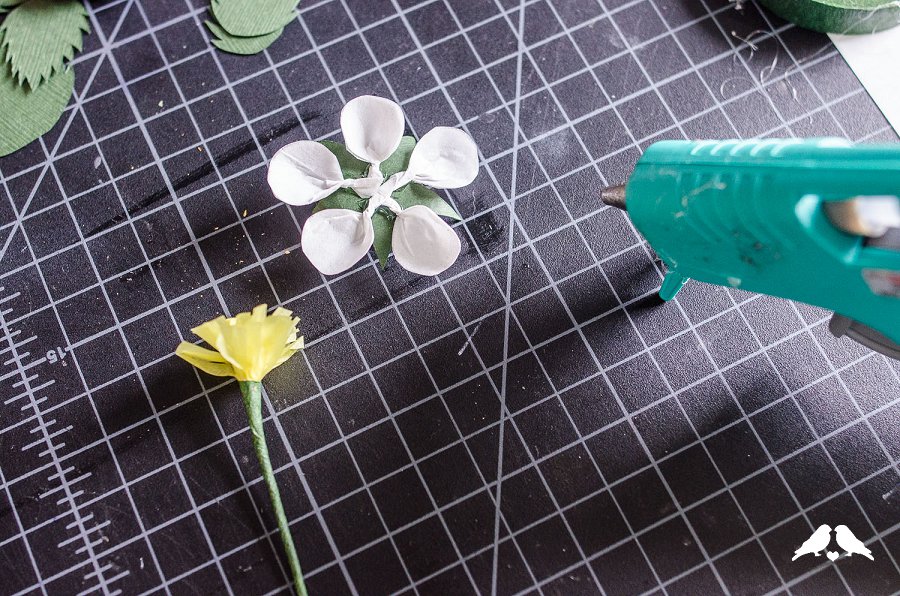
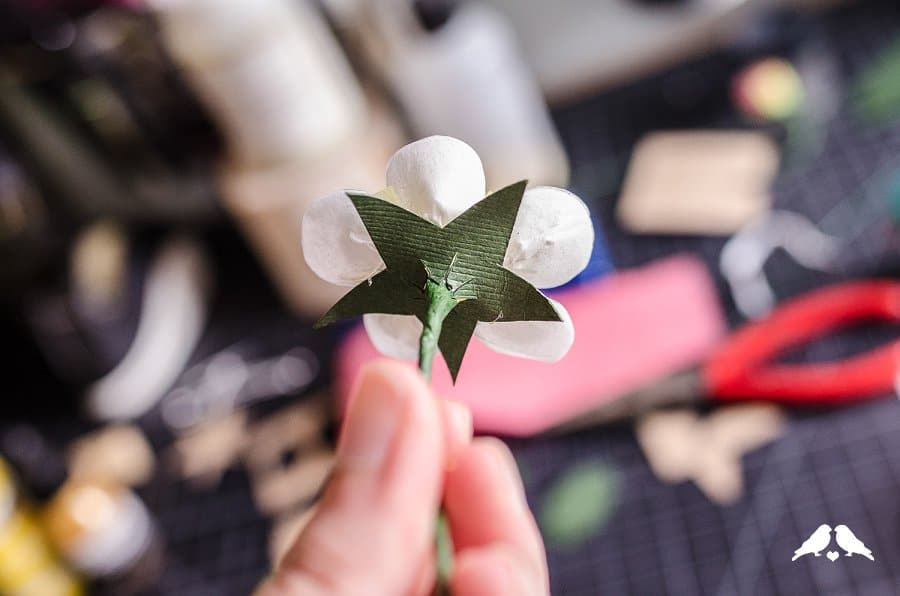
Step 4: Trace the star template onto green cardstock, and cut out using your x-acto. In the center of the star, cut lines in the form of an asterisk ( * ) symbol – this will help you slide the stem through the leaf and petals.
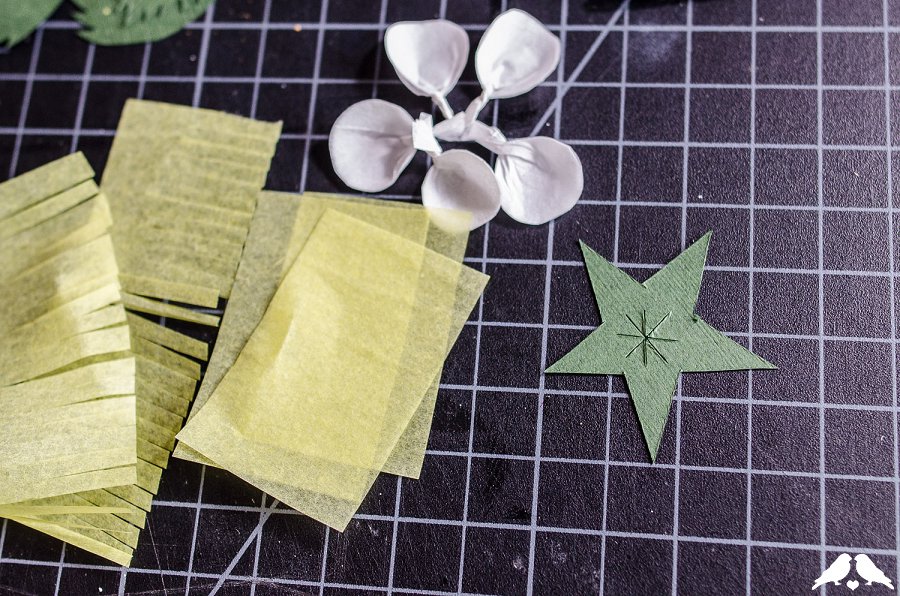
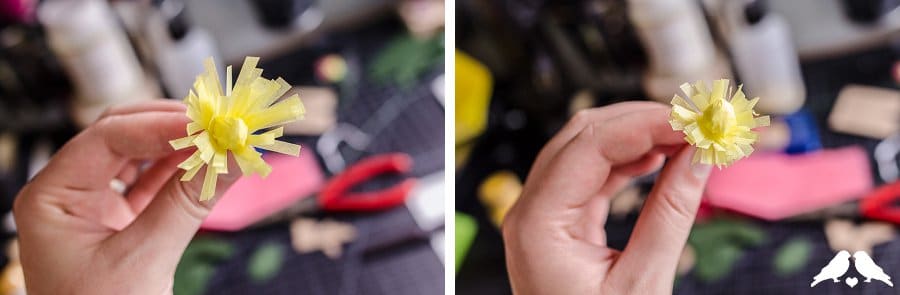
Step 5: Now begin to assemble the flower, starting with the bud center. Cut a 2” strip, single ply, of yellow tissue at least 6” long. Cut off two 1.5” lengths, and leaving a longer piece about 3.” Cut this longer piece into a fringe using scissors (or special fringing scissors, if you have them.) Take the two 1.5×2” pieces, and crumple one into a flat ball. Take a piece of wire and press the ball onto the wire, and then wrap the second rectangle of tissue around the ball and wrap with floral tape to secure. Then, take the fringed piece and wrap it around the base of the ball, fringed edge out, to create a halo of fringe around the ball center. Wrap this with floral tape also, and trim the fringe to approximately ¼”.
Click inside for the rest of our DIY Paper Strawberry Terrarium Centerpiece tutorial from Ribbons & Bluebirds!
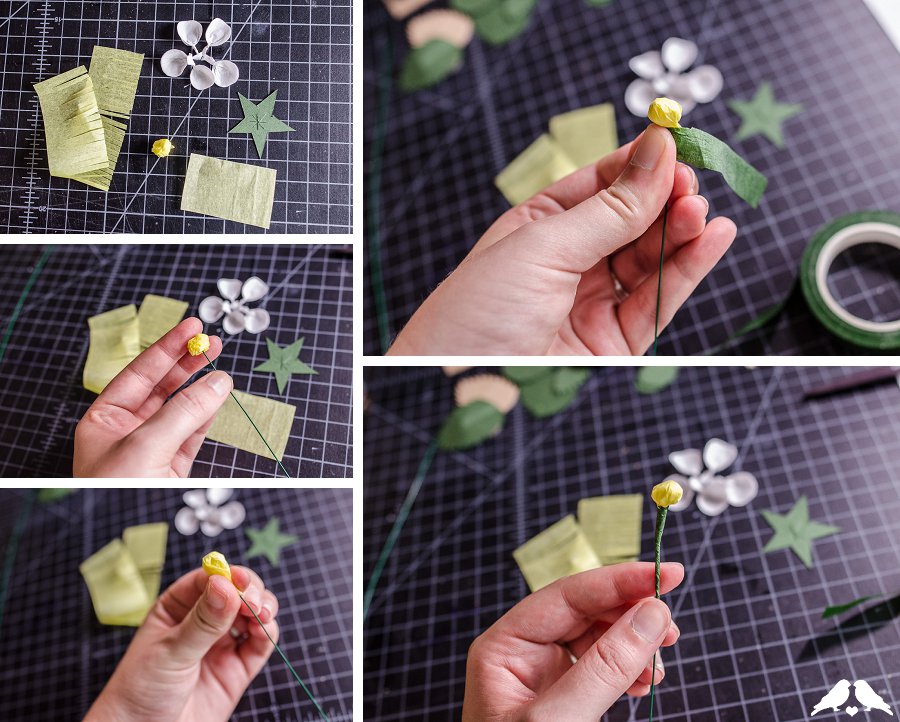
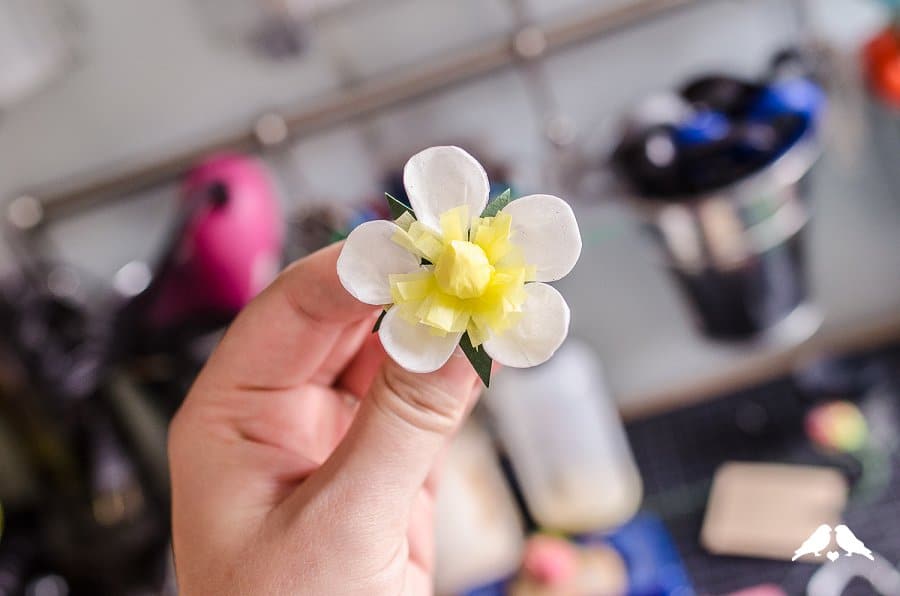
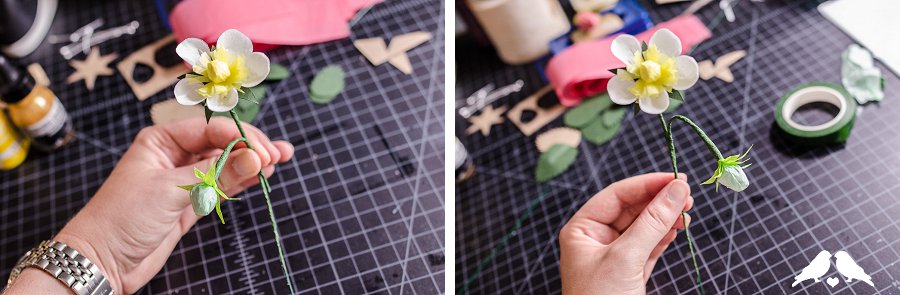
Step 6: Next, use hot glue to attach the twisted petal bases to the center of the star leaf. Arrange the petals so the point of each star is in the gap between petals, and make sure the cup of each petal faces up. When all the petals are attached, slide the bud center wire through the asterisk cut you made in the star and push to just underneath the center. Wrap the protruding pieces of the asterisk in floral tape to secure.
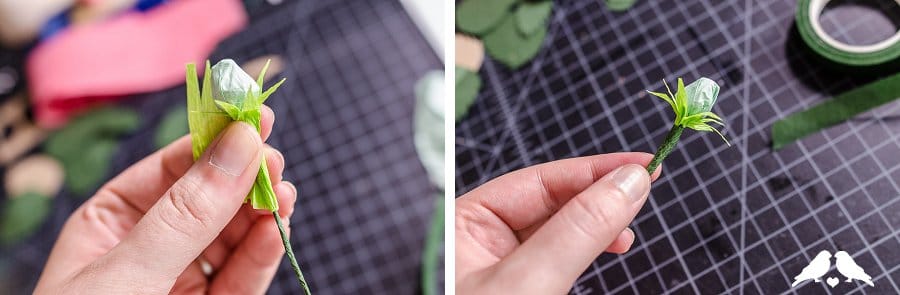
For the un-ripe strawberry bud:
Step 1: Cut two pieces of the pale green tissue, approximately 2”x2”. Crumple one into a ball like the bud center, but this time try and form a cone or pyramid shape with the tissue. Take a wire, and press the triangle’s base into the wire. Wrap with the second piece of tissue, and secure with floral tape.
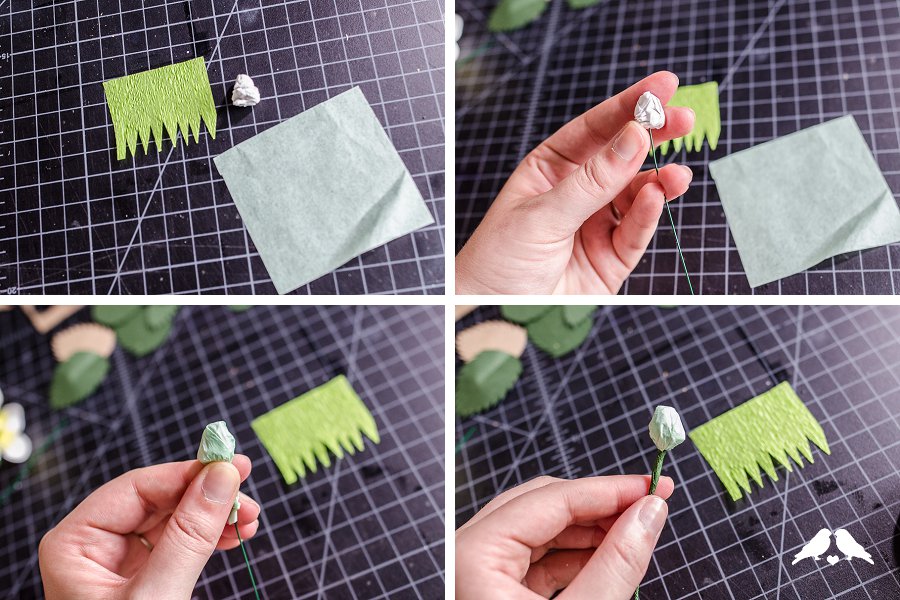
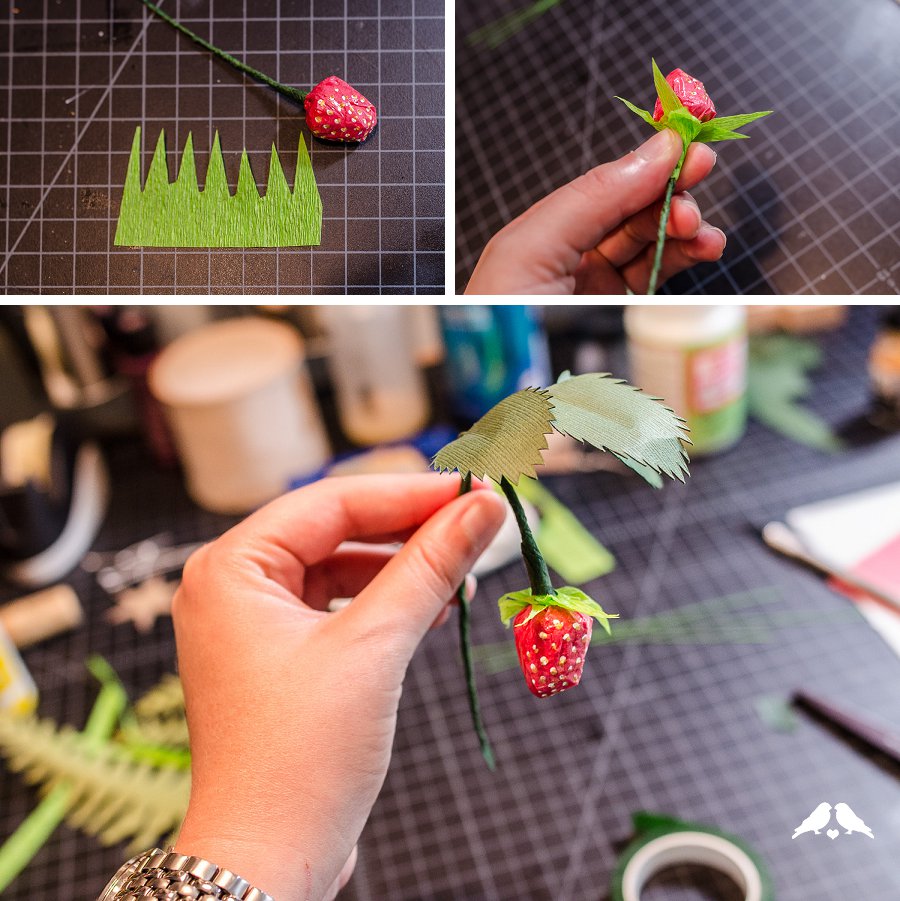
Step 2: Take a piece of lime green crepe or tissue, and cut a jagged edge. The end result should look something like the little “grass” fences used in serving sushi. Wrap this with the jagged edge out around the un-ripe strawberry to form the little stem tendrils, and again wrap with floral take to secure.
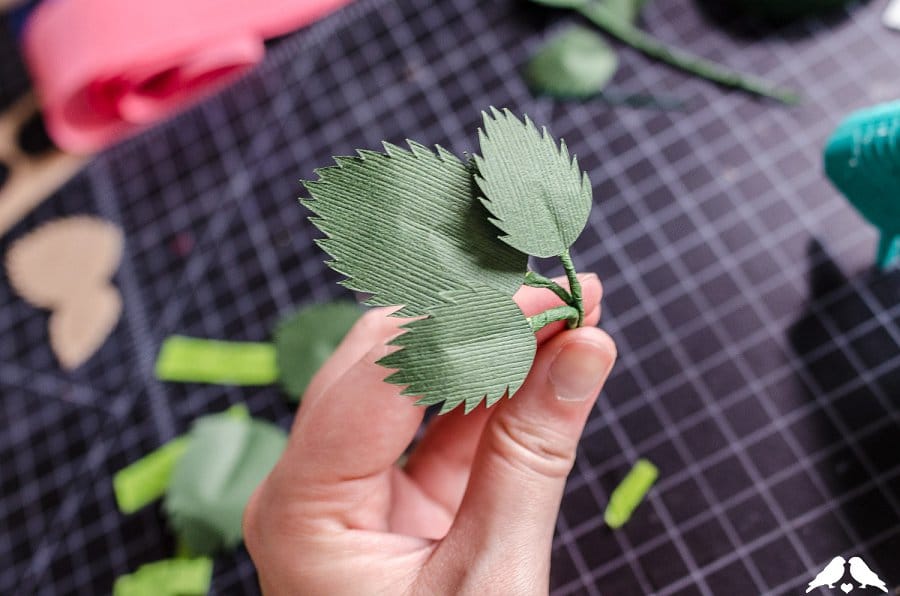
For the leaves:
Step 1: Trace and cut the leaf template on green cardstock using your x-acto. Strawberry leaves are typically grouped in sets of 3, so keep that in mind when you are cutting and always stick to multiples of 3.
Step 2: Crease the leaves to make them look more dynamic by folding the base in half and creasing lightly, about halfway up the leaf. Fold the front part down, to create a drooped look for the front of the leaf.
Step 3: Cut thin strips of the lime green crepe or tissue, one for each leaf. To attach the leaves to the wire stem, place a strip of hot glue on the back of the leaf. Quickly press the wire end into the leaf, then cover with the lime strip and press it into the hot glue to secure. Then wrap the end in floral tape to cover and excess lime tissue and to keep the leaf firmly attached to the wire.

Step 4: Arrange leaves in groups of 3, then secure with more floral tape.
For the ripe strawberries:
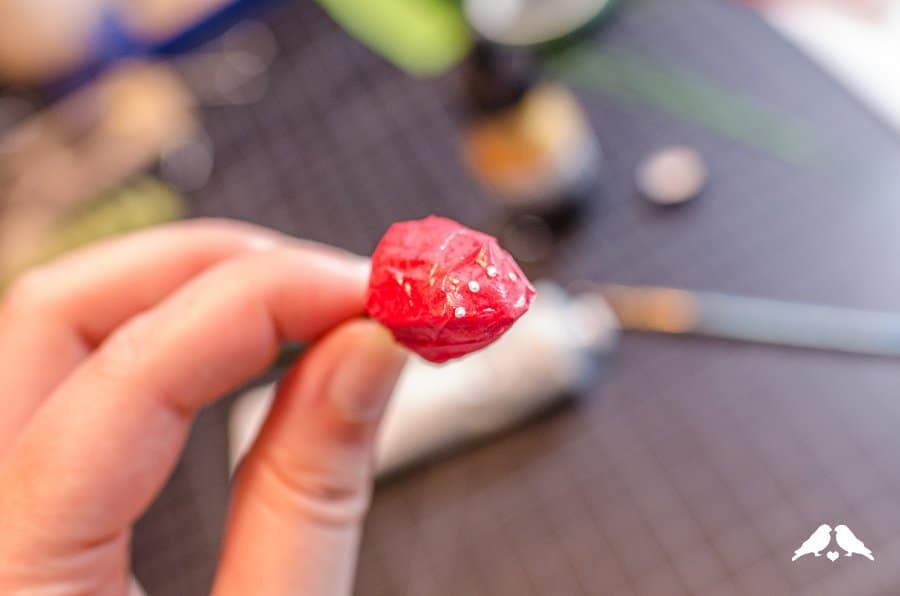
Step 1: Begin by cutting 3 4-ply strips of tissue into rectangles at least 2×3”. Crumple one of these stacks into a round ball, then wrap with a second and crumple mostly at the base to form a wider “pyramid” of crumpled paper. This should be bigger than your un-ripe strawberry.
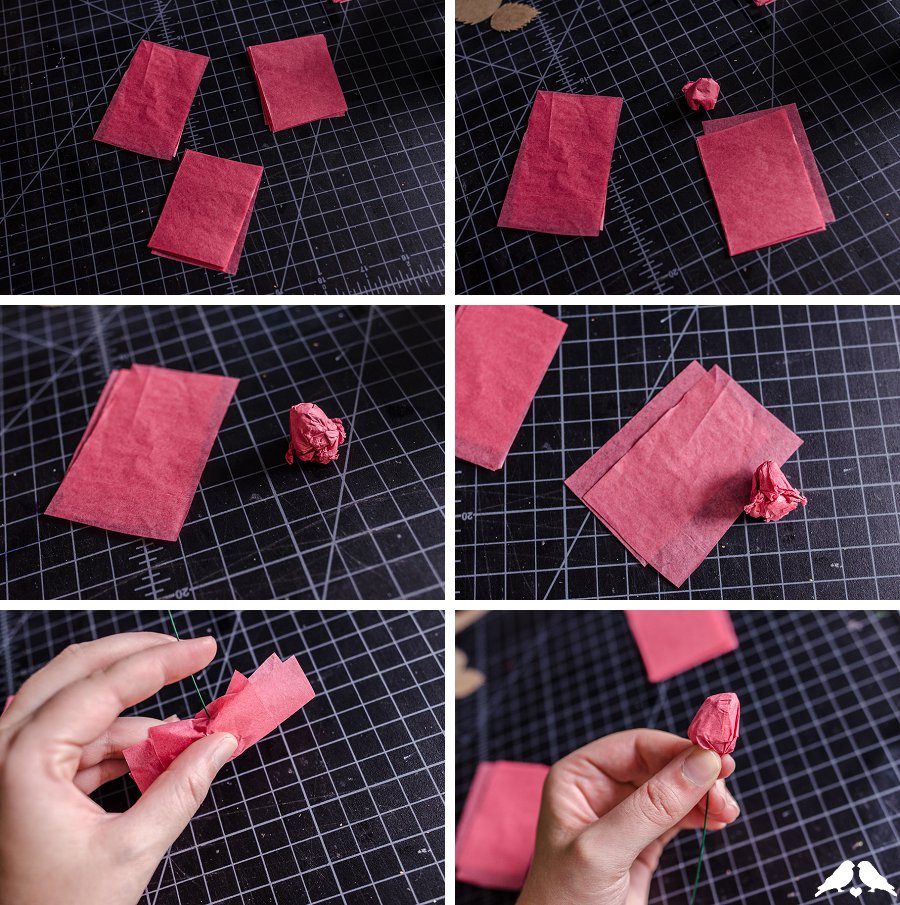
Step 2: Press the base of the crumpled pyramid into a wire stem, then wrap with 2 of your 4 remaining sheets of tissue. To keep the surface of the strawberry as smooth as possible, fold the opposite short sides in first, then the longer ends with two intentional creases on each side. Wrap the ends with floral tape to secure, and repeat with the last two sheets if you’re not happy with the surface appearance of your strawberry.
Step 3: Coat the strawberry in glossy Modge-Podge, if desired.
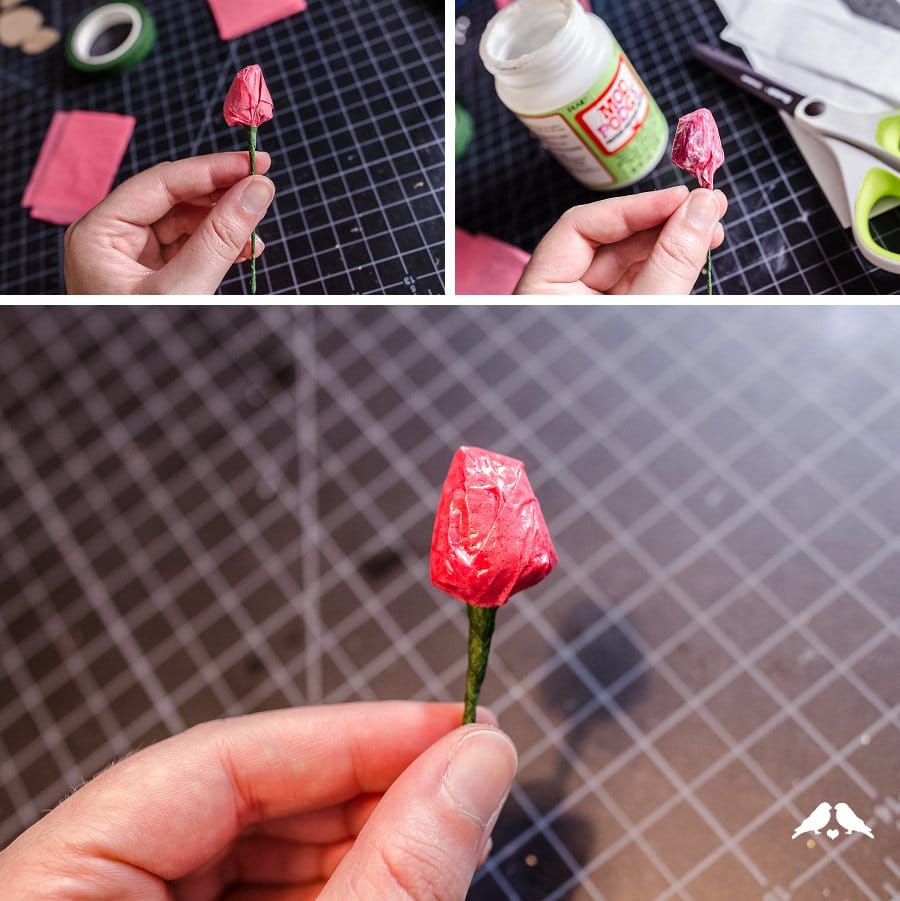
Step 4: Paint the seeds onto the strawberry by starting at the tip of the berry and painting white dots in an offset pattern. Follow with gold or brown paint offset from the white dots slightly, to give a raised impression.
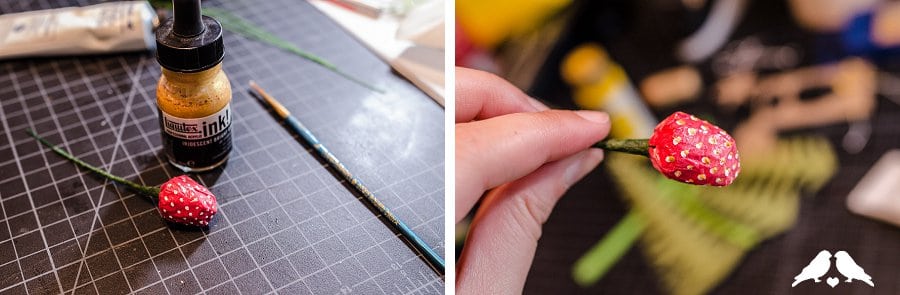
Step 5: Use the same technique as before with the lime crepe with jagged edge to create the tendrils for the berry – wrap the painted strawberry with the crepe edge, fringe down, and secure with floral tape.
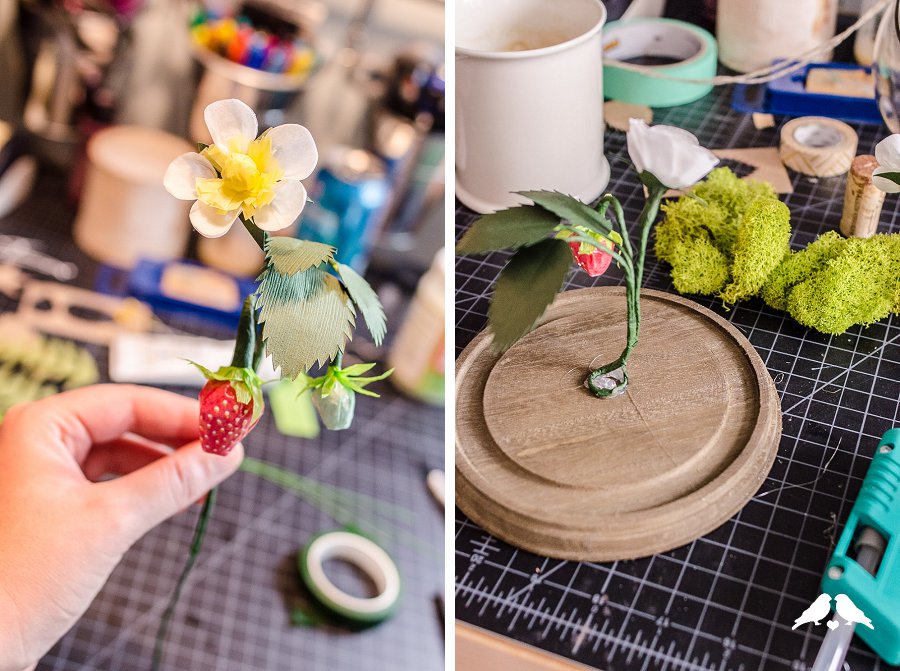
To assemble the finished stems:
Step 1: Strawberries usually hang underneath leaf groupings, and the blossoms can be arranged just above the leaves. If you have a tall cloche or vase, you can arrange another row of leaves on top of the blossoms to be more realistic, but some artistic silence is encouraged here to best fill your container of choice :)
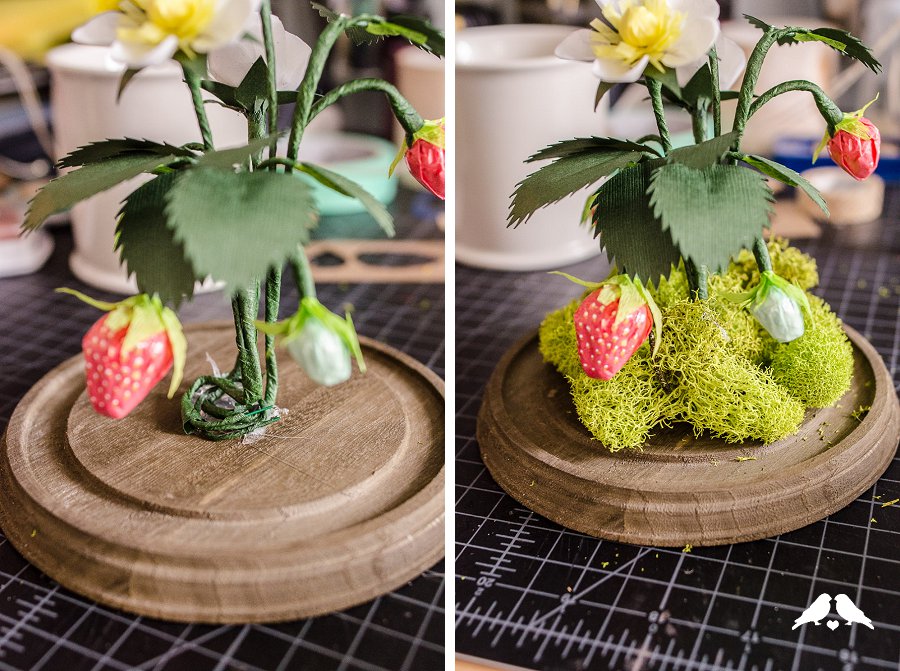
Step 2: At the base of each stem grouping, twist the wire to form a flat base for the stem to rest on. Secure to your display base with hot glue.
Step 3: Layer each of your pieces onto the base and attach with hot glue – remember you can always adjust the direction and overlap of the pieces afterwards since everything is on floral wire.
Step 4: Cover the ends and glue with floral moss, and you’re all done!
I think these would make an incredible centerpiece, and because they’re covered in glass the arrangements, can be made way in advance, and kept dust-free! The strawberries are perfect for a summer party, tea, or shower – and then they can stay fresh in your bookcase year round with their sweet little blossoms.
So cool!! Thank you Ribbons & Bluebirds and as always, Romancers, let us know if you use our tutorial to make the project you see here!