Tassel garlands are all the rage in the wedding industry right now. It’s easy to see why – they are awesome. They add perfect pops of color and a modern flare to a dessert display or sweetheart table. For DIY Wednesday, Ribbons & Bluebirds tackles the DIY Tassel Garland tutorial with flare – adding her own special addition to it (of course). I hope to try my hand at this tutorial sometime soon!
DIY Tutorial: How to Make a DIY Tissue Paper Tassel Garland

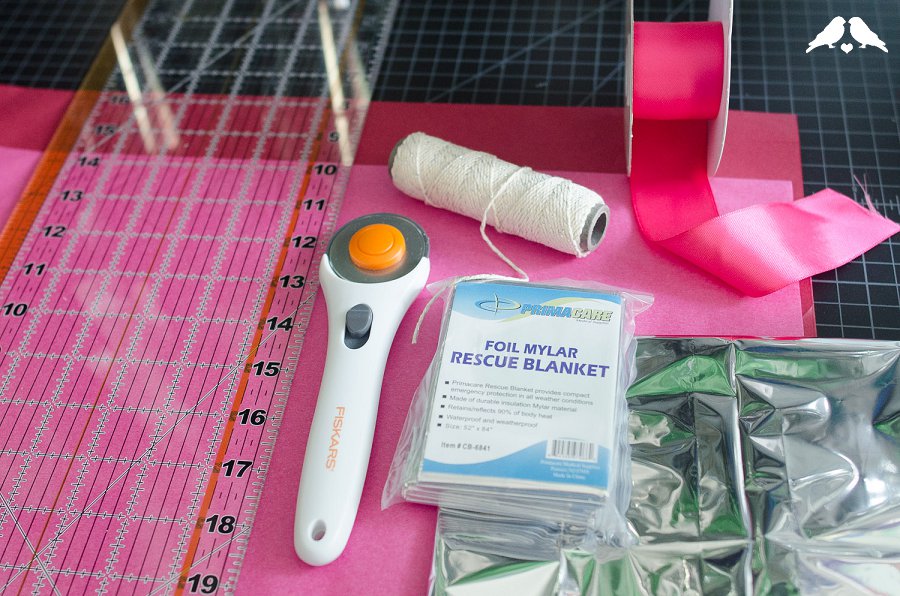
What you need:
- Tissue Paper, in whatever colours you like
- Mylar sheets, if desired (I purchased mylar foil emergency blankets)
- Cutter – I used a rotary cutter but x-acto or scissors will work
- 18” ruler and cutting mat if using a cutter or x-acto
- Twine
- Ribbon for hanging
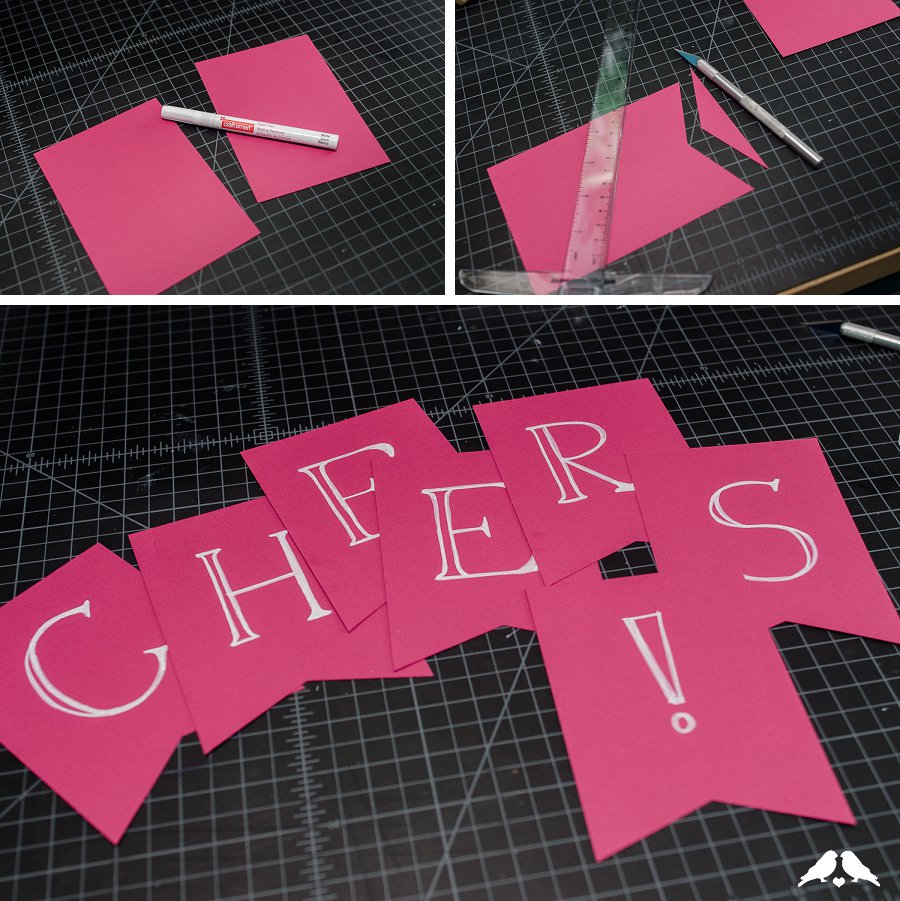
- Cardstock – 4.25×5.5” per letter
- Paint pen
Garlands and banners make an awesome backdrop for your party, whether for a birthday or your wedding day! These tissue garlands combine with a festive message in the center for a colourful punch in your decorations. They’re also so easy to make, with no glue or drying time needed.
A couple of tips on purchasing your materials: As we saw in yesterday’s awesome DIY details, you don’t need to use conventional packaged tissue paper, as long as you’re using lightweight material. You can use paper tablecloths, mylar foil, or fabric too. I purchased a multi-pack of foil blankets intended for emergency warmth for a fraction of the cost of one small pack of mylar “tissue” foil for my silver flashes, and a multi-colour bulk pack of tissue for lots of colour choices.
Step by Step DIY Tissue Paper Tassel Tutorial Instructions:

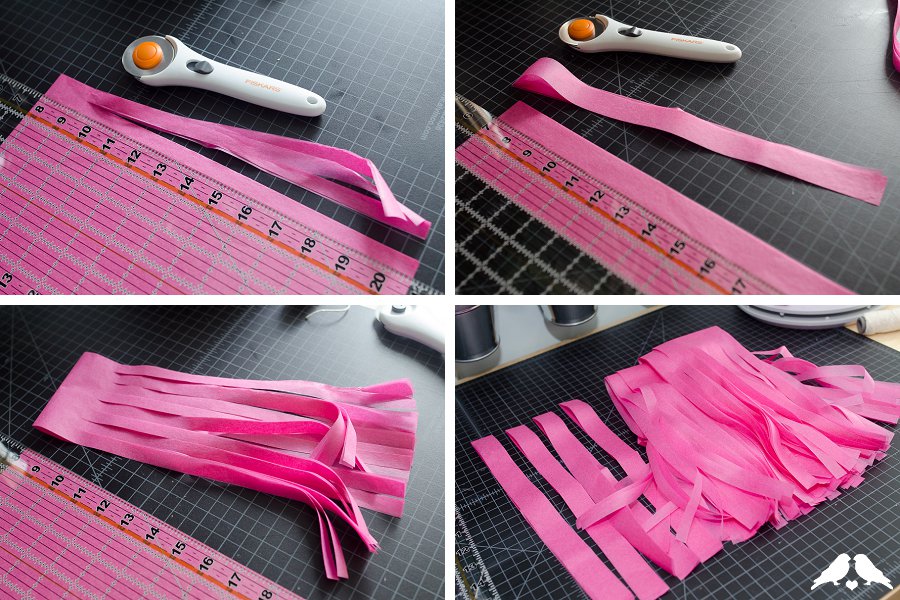
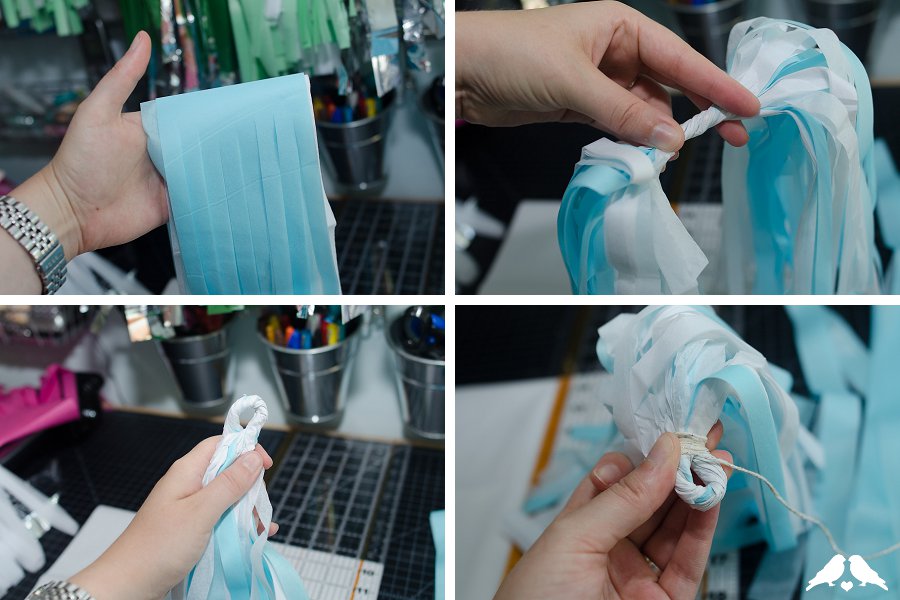
Step 1: Cut Tissue. To save time with cutting your tissue, start by layering the sheets if they aren’t already (most pre-packaged tissue will come stacked already.) Fold in half cross-wise to make each strip as long as possible. Using whatever cutting method works for you, cut a long strip from about 2” from the fold down through the tissue to the bottom to create a fringe. I cut mine in ½” strips, and after 4 inches I cut the through the whole sheet top to bottom. You should be able to get at least 3 fringed 4” sections from your folded tissue – I then cut the remaining tissue into 1” wide separate strips (see photo.) Repeat with all your colours.
Step 2: Cut Mylar (if using). The mylar is more finicky, so I chose to use masking tape dots to hold it down to my cutting board as I progressed. Because I found the mylar tore more easily, I didn’t chose to cut any fringed pieces, and instead cut it all into 1” individual strips.

Step 3: Make pennants for message. If starting with 8.5×11 sheets, cut into quarters for 4.25×5.5 final size. To add the flag detail at the bottom, measure up ¾” from the center of the bottom, and cut from the bottom corners to that point. Use a paint pen to draw your letters (or purchase pre-cut out letters to use) and finish by punching holes at the corners for mounting.
Step 4: Assemble. For each tassel, whether using 4” fringed pieces or 1” individual strands, the method is the same: gather 4-6 sheets of fringe or 10-15 individual strands in your hand at the center, twist into a strip, then around to form a loop. Finish by tightly wrapping a strand of twine 5-6 times around the loop, then tie in a knot to secure.
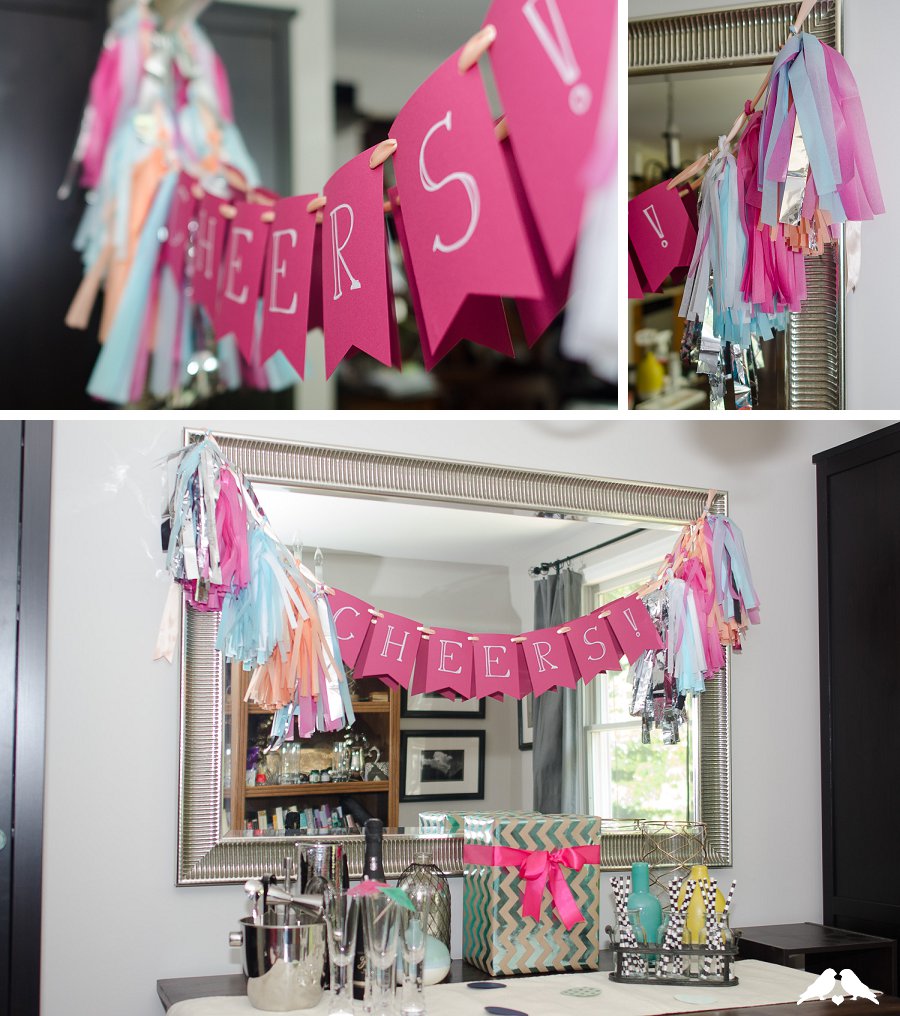
Step 5: String the tassels and letters onto a ribbon for hanging. To finish the garland, wait until everything is strung then trim the ribbon edges with a clean cut and dab with clear nail polish to prevent fraying.

All done! I love all the fun colour combinations possible, plus the variety of textures from mylar or other lightweight materials of your choice.
Let us know if you use our tutorial! A very special thanks again to the very awesome & talented Ribbon & Bluebirds for sharing this awesome step by step wedding DIY tutorial!
[icon size=”small” image=”icon-heart”]