
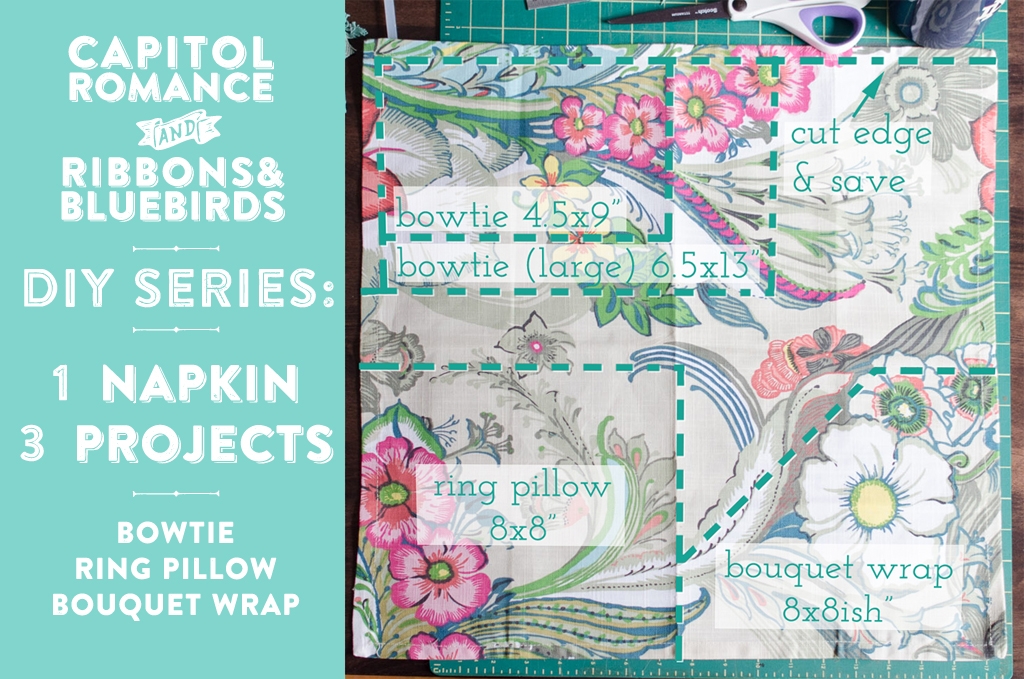
We’re back with Ribbons & Bluebirds and Part 2 of our DIY Tutorial series – 1 Napkin, 3 DIY Projects (Part 1: How to make a DIY bouquet wrap is here). Today we are bringing the second project – how to make a DIY bowtie! If you’ll remember, first you need to cut your initial fabric napkin like so:
DIY Tutorial: How to Make a DIY Fabric Bowtie
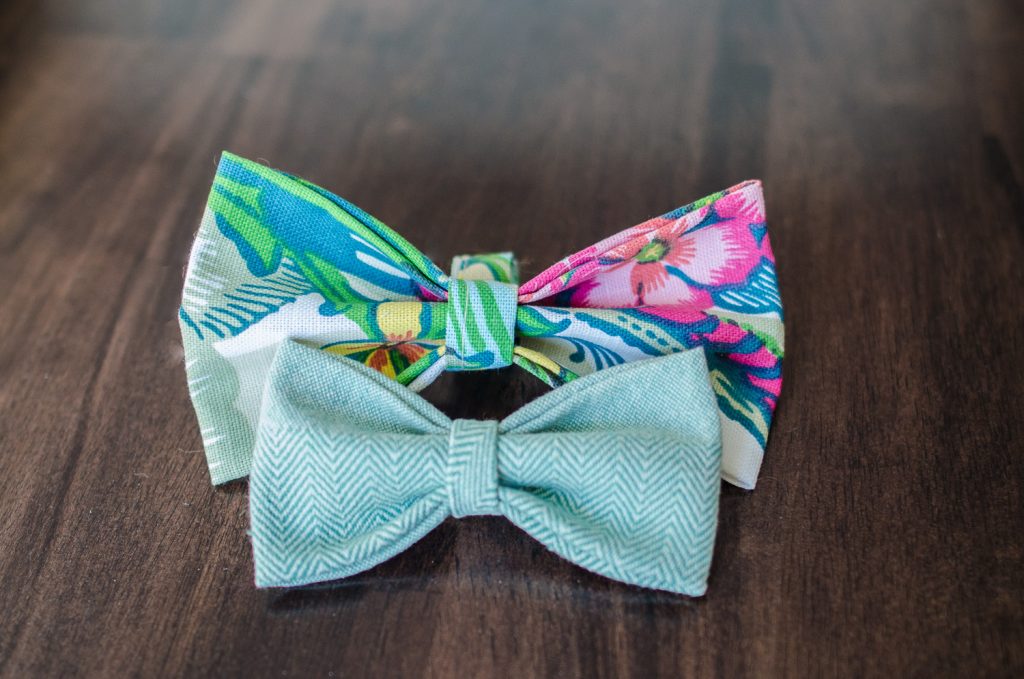
These bowties are SUPER easy, fun to make, and look sharp! I love how choosing different fabrics totally changes the feel of the bowtie, but they all start with the same formula.
What you’ll need:
- 1 fabric napkin, at least 16×16” square
- Iron & ironing board
- Hot glue gun (low heat if you’re like me and end up touching the glue a lot!)
Directions:
Step 1. Cut a rectangle of fabric for your bowtie: standard bowties want a rectangle 4.5 x9”, but you can use any dimensions you want as long as you keep the ratio of width to height 1:2. For my larger bowtie (so you can see it when my super furry dog is wearing it) I went with a 6.5×13” rectangle.
*When you’re cutting the napkin up, save the hemmed edges to use as the center wrap (or be prepared to do some extra ironing with scrap fabric.)
Step 2. Start by folding your napkin length-wise, so that the outside edges will meet in the center. This means your folds are at the ¼ marks in from each edge – for a standard bowtie, this means 1 1/8” in from the edges. Iron those folds nice and flat.
Then do the same thing in the short direction – fold the edges inwards so they meet in the center. For a standard bowtie, this means you’re folding at 2 1/4” from the edges. Iron these folds flat too.
Step 3. Now comes the glue-up! I like to pre-pinch the bowtie, to get the fabric used to folding the right way before I add hot glue since you need to work fast for maximum stickiness. Once you’ve got a shape you like, start by adding two lines of glue in the center of the back, and pinch the middle of the bowtie while it dries. Then, glue each top flap down (glue goes on the front.) When you’re finished this step, the bowtie should hold its shape even when you put it down.
Step 4. To finish, glue one end of your saved hemmed edge (or a ribbon, or a piece of scrap that you’ve ironed the raw edges inward…or whatever you want!) onto the back of the tie. Wrap it around the front, back to the back, trim, and glue the end in place. If you want to make a loop (like if you bowtie is for a dog collar) then instead of trimming, wrap your finishing fabric around one more time, and glue on the underside.

You’re all done! If you wanted this bowtie to have a clip, you can glue one right onto the back with your hot glue so it’s ready to wear.

Wasn’t that EASY?! A perfect way to match your bouquet to your four-legged friend! Especially if he or she is going to be a part of your wedding day. A special thanks again to Ribbons & Bluebirds for sharing yet another, super awesome DIY tutorial with us!
[icon size=”small” image=”icon-heart”]


3 comments
Oh my gosh, this is EXACTLY what I was looking for. What a great tutorial, thank you! We’re taking our Christmas pictures in a couple of days, and I was trying to figure out how to make a no-sew plaid bow-tie for my pooch from a cloth napkin. Thank you!
yay! so glad our tutorial helped :)