
Kicking off the week with an awesome DIY tutorial from Ribbons & Bluebirds that is just PERFECT for the upcoming Valentine’s Day holiday! Introducing: Scratch Off Valentines! These adorable, easy to make cards are a fun little way to show your loved ones you care with a homemade card. The scratch-off is simple and quick and can obviously be used for fun Save the Dates or RSVP cards in your wedding invitations too! Take it away Ribbons & Bluebirds!
DIY Tutorial: How To Make DIY Scratch-Off Valentines Day Cards

Supplies you will need:
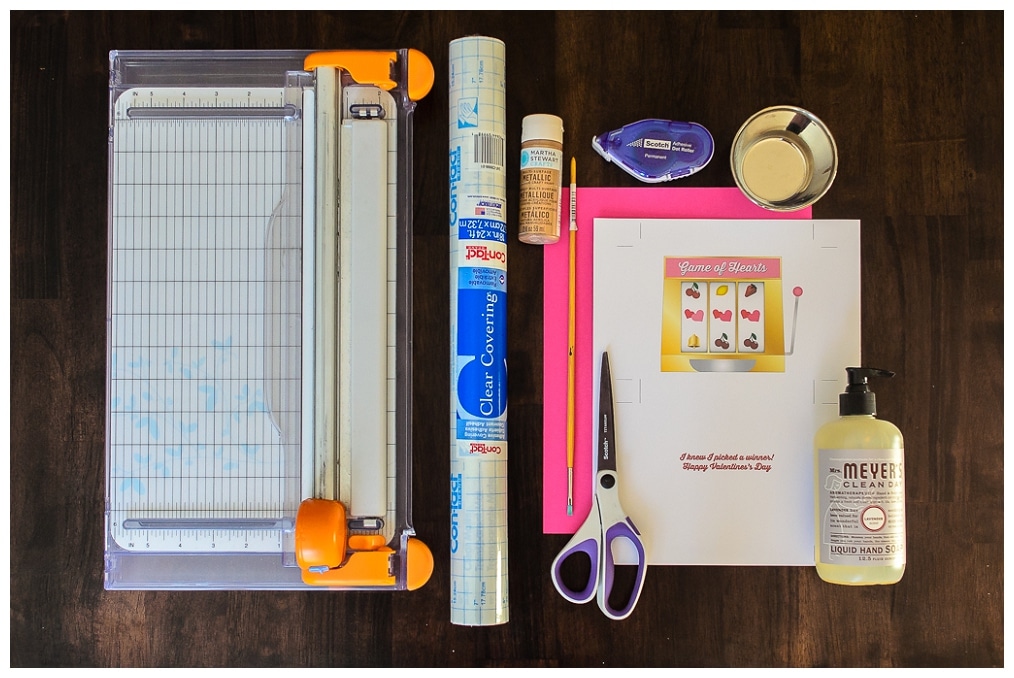
- White cardstock, 8.5×11 (letter) size sheets
- Coloured cardstock, any colour
- Paper trimmer (or utility knife + ruler)
- Printer
- Clear contact paper OR clear packing tape
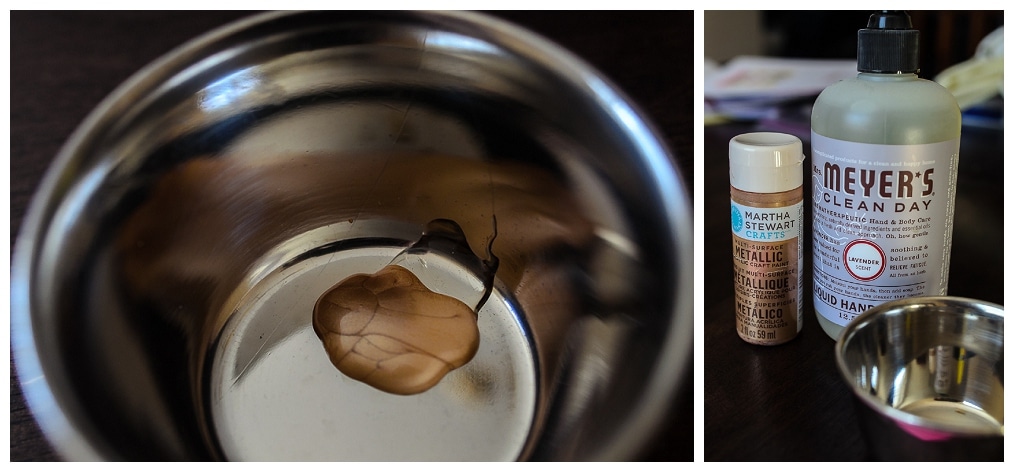
- Paint – I used Martha Stewart Metallic Craft Paint (in Rose Gold)
- Liquid soap
- Small dish for paint + art paintbrush
- Glue tape or similar (I used Scotch GlueDots)
- A2 size envelopes (optional)
Step by Step Directions:
Step 1. Download the card template available at Ribbons & Bluebird’s blog.
Step 2. Print your cards! The templates are laid out on 8.5×11 sheets, ready for your printer, and include crop marks. Make sure you have the print set to Do Not Scale, otherwise your printer may try and reduce the size of the cards. The front and the back of the card will print on the same sheet.
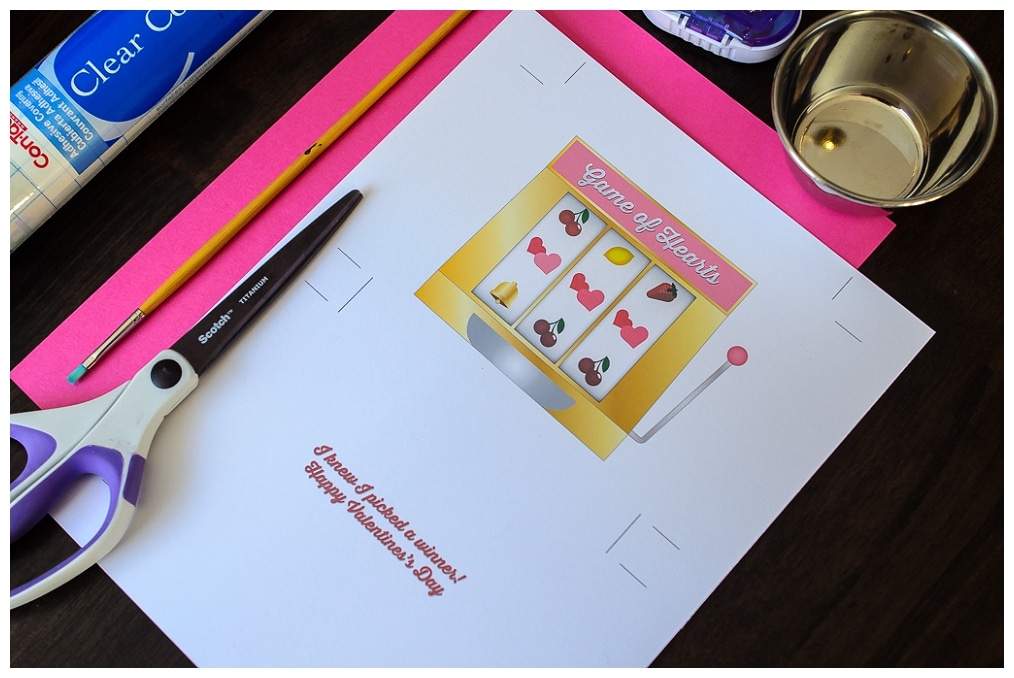
Step 3. Next, trim the cards and the backer paper. The crop marks on the cards show you where to cut, but the finished size should be 5.25” wide by 4” tall (in case you trim off the crop marks by cutting across the sheet.) Next, cut a rectangle out of your coloured cardstock that is 5.5” wide by 4.25” tall.
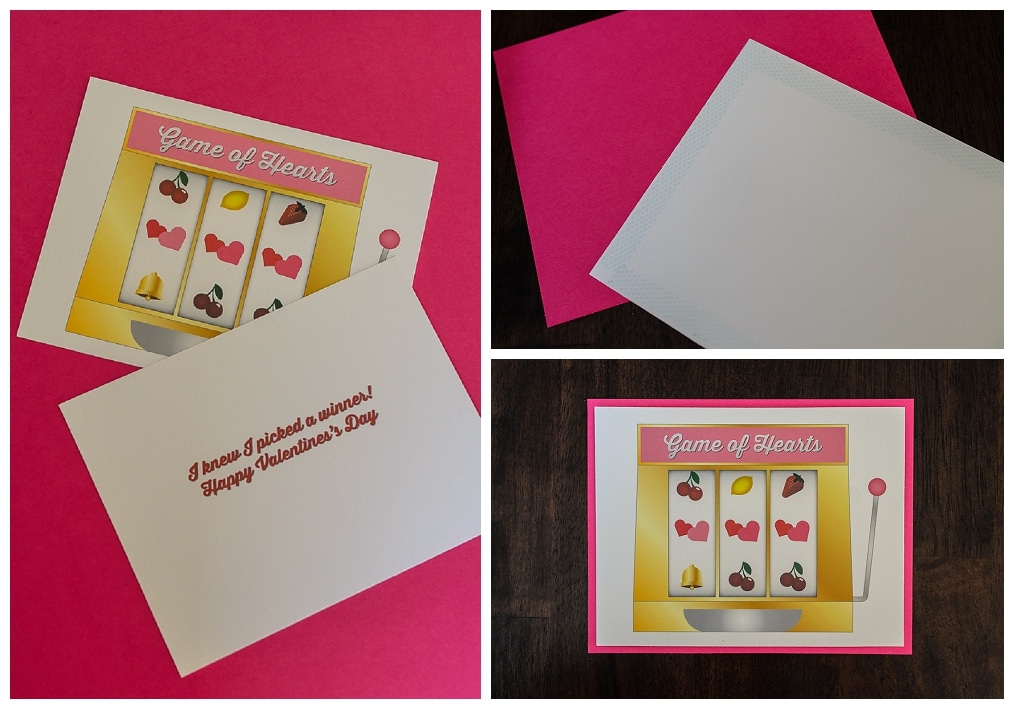
Step 4. Mount the front and back onto the coloured backer paper using the glue tape. Center the card before pressing down, and remember when you mount the back to check and make sure the same side is “up” on both front and back ☺
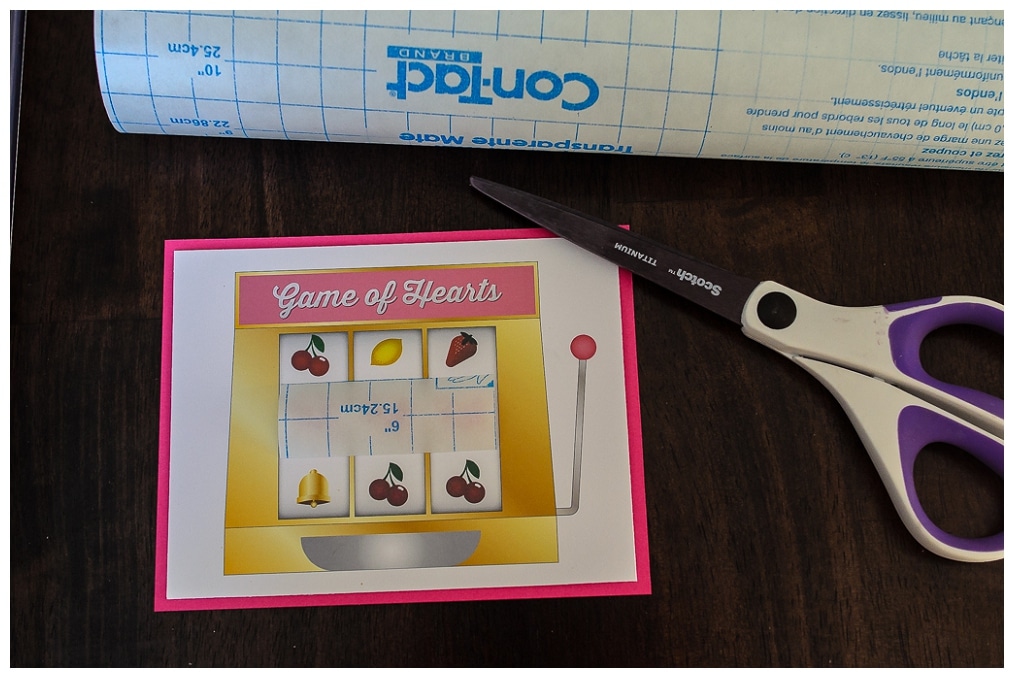
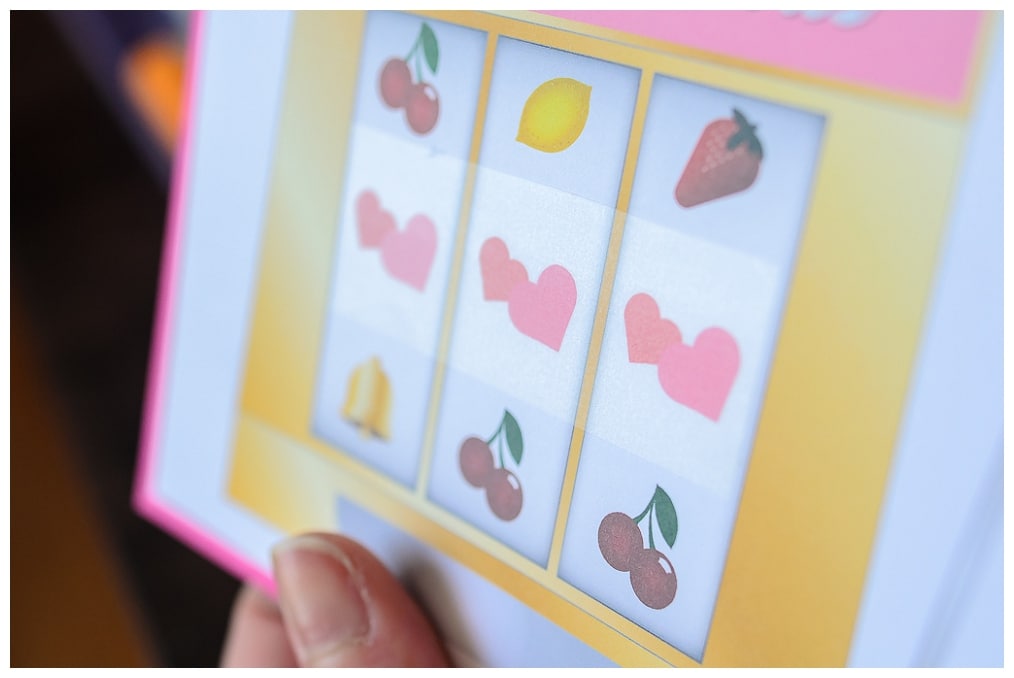
Step 5. Now it’s time for the fun part! Cut a rectangle of contact paper tall enough to cover the center icons, and wide enough to span from one side of the “slots” to the other. Close is close enough here! Peel the backing off the contact paper, and stick it down over the center icons.
Click inside for the rest of our step by step, DIY tutorial for Scratch-off Valentines Day Cards from Ribbons & Bluebirds!
Step 6. Next, mix a tiny dab of soap into your paint dish, and add paint. The paint to soap ratio should be about 3 parts paint to 1 part soap.
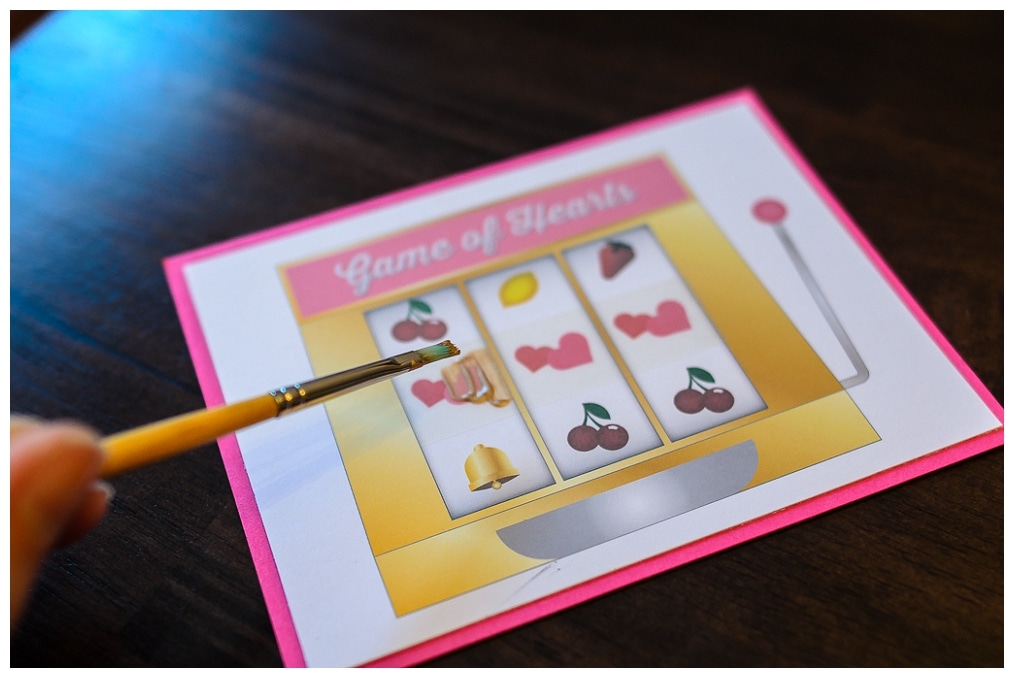
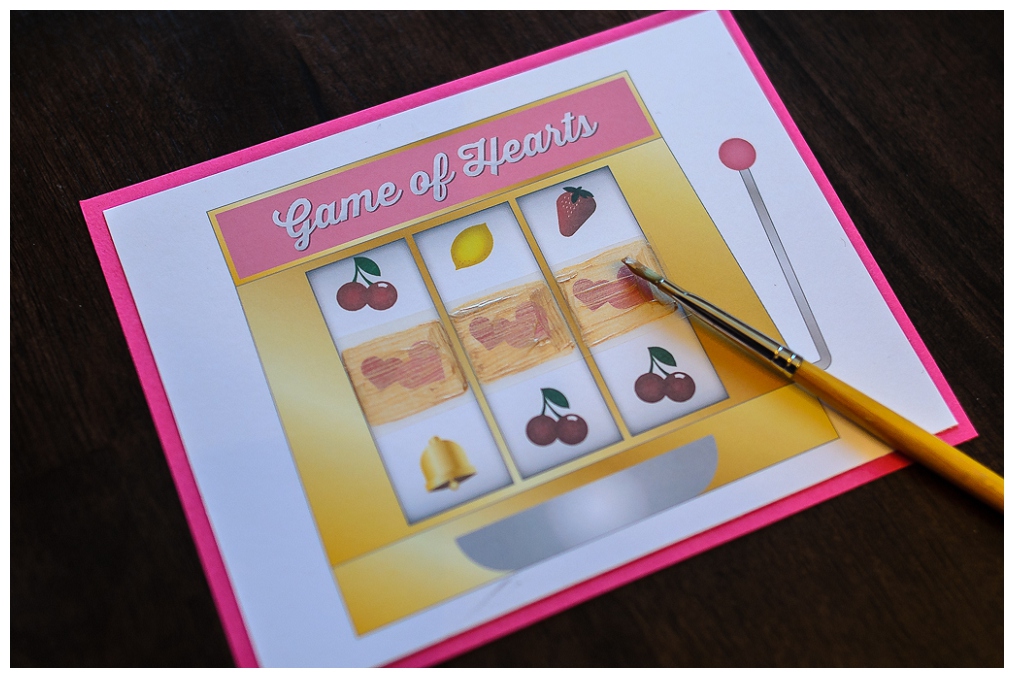
Step 7. Carefully paint over the icons with a thin, even coating. Don’t worry about the first coat being a little transparent, because with multiple coats it will cover just fine. Wait about 15 minutes between coats – it will probably take about 3.
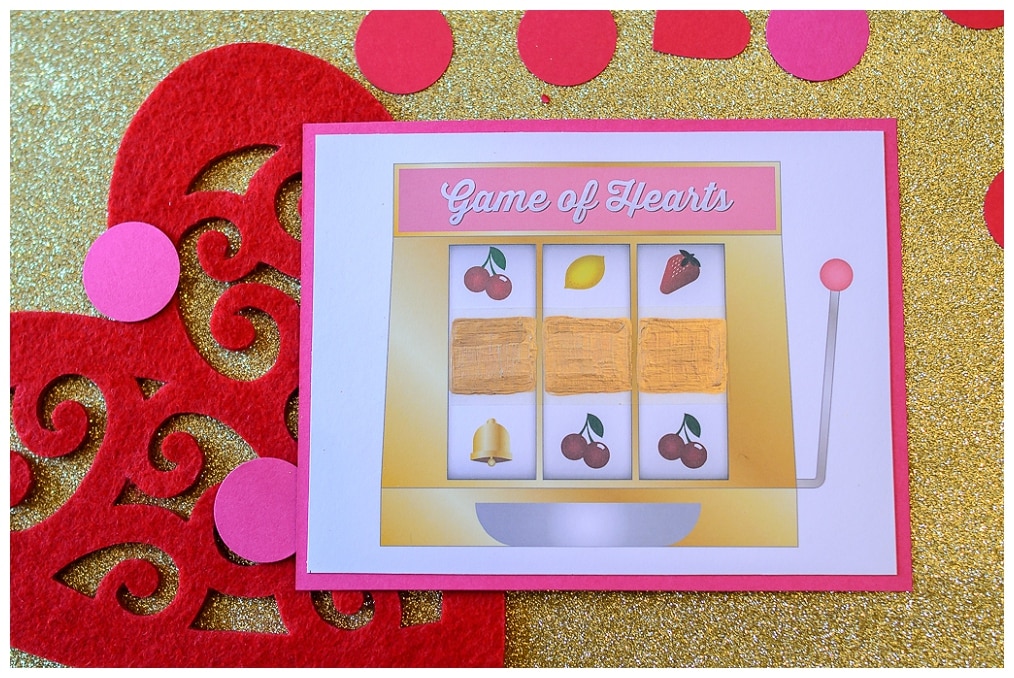
Step 8. Once it’s dry, you’re all done! Present to your Valentine, perhaps with a shiny penny for luck? ☺
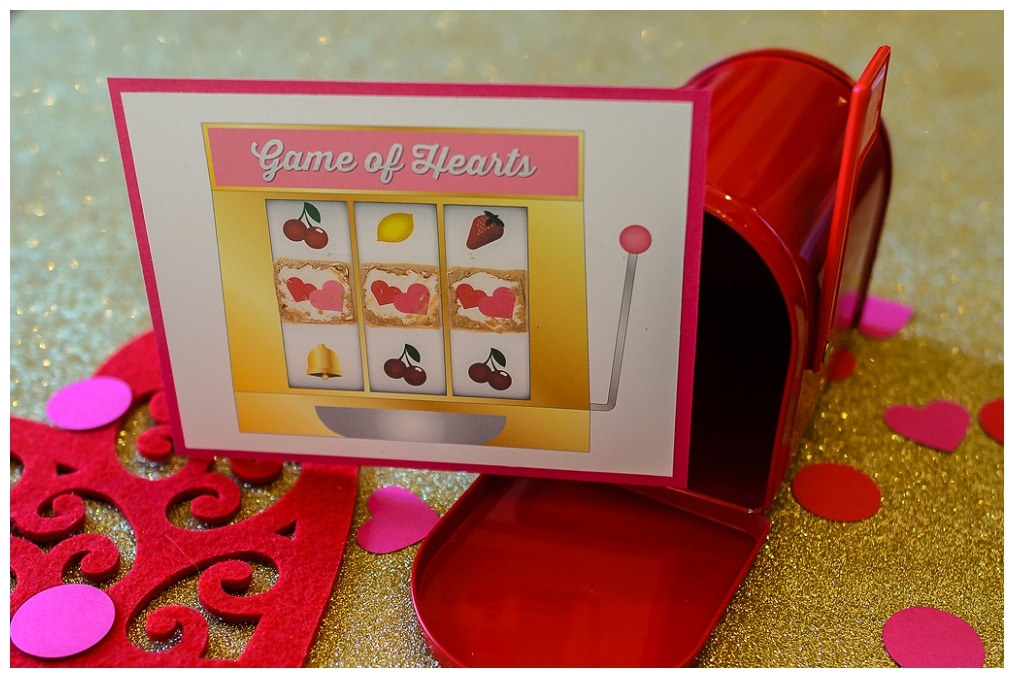
Aren’t these just the cutest (and easiest!) DIY scratch-off Valentines Day cards?! Let us know if you end up making them! We’d love to hear how they came out! A special thanks again to Ribbons & Bluebirds for her awesome DIY tutorial & free printable!
[icon size=”small” image=”icon-heart”]
2 comments