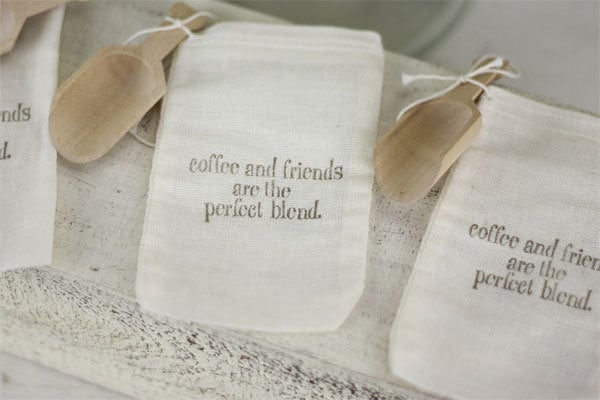
It’s been entirely too long since I have done a DIY Wednesday post! Today we have a guest poster, Trisha Jefford, sharing a DIY wedding tutorial on creating one of my favorite easy & unique wedding favors, Coffee! Coffee favors are awesome wedding favors because the style can be rustic (burlap!) or modern (shiny bags) and there are so many fun phrases to include in the favor display. We have some below!
Trisha has worked a variety of jobs across the food service industry from waiting tables to being a personal chef. She is a wife and mother of two wonderful girls. She currently writes for EZ Cater, a site specializing in finding you the perfect corporate caterer.
Here’s her tutorial:
DIY Tutorial: Coffee Wedding Favors

[photo via Katrina Louise as seen on Wedding Chicks]
Deciding on whether or not to supply your wedding guest with a favor or small gift can be a tough choice. On one hand, you want to let them know that your truly appreciate the time and effort that they extended to make it to your big day. On the other, you’ve already spent so much money on rentals, food and entertainment that adding another item to this list seems like it could be the straw that breaks the camel’s back.

[via Bridal Guide, photo via Bragging Bags on Etsy]
Giving your guests a small thank you gift for either your rehearsal dinner or ceremony doesn’t have to mean a huge gouge to your savings account. A great party favor that I frequently suggested to brides and grooms to-be back in my catering days was to make their very own bag of coffee! This project can be accommodated to a wide range of budgets and only takes about an hour to do!
To accomplish this intimate and personalized DIY you will need the following items:
- a package of small brown paper lunch bags
- a spool of ribbon or twine
- computer sticker paper or a stencil
- your favorite coffee (beans or grounds)
- some tape

[photo via Real Life Photography]
Step One:
You’ll need to go out and grab some of your favorite coffee. You can spend as little or as much on this as you see fit. Going out and spending a boat load of money on the most expensive coffee roast doesn’t have to be a necessity as you will be putting it in your own bag and re-naming it anyways. Getting a flat of a generic grounds or beans from a warehouse store like Costco can work perfectly for those of us who are more economically minded.
Step Two:
Before you load up those bags with beans you’ll need to dress them up a little bit to get them in line with the aesthetic of your wedding. Think about what will work for both you and your guest. You’ll need a name for your roast so think of how you can tie in your last name with some clever coffee jargon. Something like, “The Jameson Brew”, or “Smith Roast” works great.
If you have access to a craft store you can easily get a stencil kit or if you’re more ambitious you can make your own, the internet is alive with instructional videos and tips and tricks to make this happen. I would often suggest just getting some cheap, inexpensive sticker paper and print out some simple nameplates that you whipped up in Microsoft paint or Word. Either choice you make, you’ll want to put this design in the center of the bag so it’s clear and easy to read for all your wedding patrons.
Step Three:
After the label is complete consider putting some twine or ribbon around the name to embellish the bag a little further. When it comes to pouring the grounds or beans into the bag you don’t need to go overboard. Put just enough in for a pot or two, the emphasis being more on the presentation and the thought then the longevity of the gift. Fold the top three or four inches of the bag down and tape it to the back of the bag and presto, it’s complete!
On the day of the wedding arrange for them to be handed out as guests exit, place them on a table or designate one of the wait staff to be in charge of their distribution.
Thanks to Trisha for sharing her DIY Coffee Favor Tutorial with us today!


2 comments
This DIY coffee wedding favors is just stunning!
These are really adorable. Nice idea.